How Elementor AI Assistant Can Save You Time and Boost Productivity
Table of Contents
In recent years, website building has become more accessible than ever before, thanks to the rise of WordPress drag-and-drop page builders like Elementor. However, even with the simplicity that page builders provide, creating a visually stunning and functional website can still be a daunting task for some. That’s where Elementor AI comes in – the latest innovation from Elementor that utilizes artificial intelligence to help users in their workflow to create websites with ease. In this article, we will dive deep into Elementor AI assistant, exploring its features and how it can help users streamline the website building process. Whether you’re a beginner or an experienced web designer, Elementor AI assistant could be the solution you’ve been looking for to cut down tedious/repetitive brainstorming tasks and use that time for creative designing process.
What is Elementor AI?
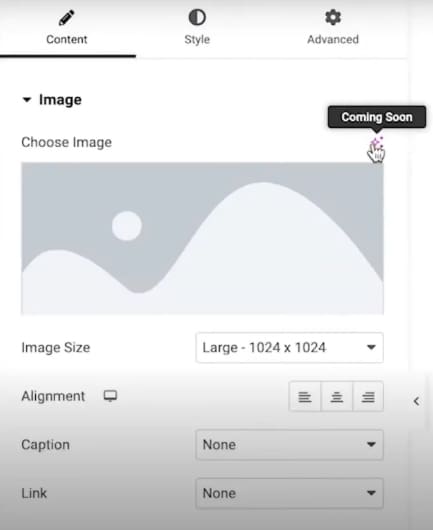
With AI becoming a vital tool in many industries, Elementor AI combines the worlds of AI and website building, making it a great productivity utility for creators. Elementor AI can help you save significant time and effort on various tasks, including content writing and coding. It can generate text for the web page ‘Write with AI’ (Include in the Free version and you can use the free trial quota), generate custom CSS for elements and code snippets to make site-wide changes ‘Code with AI’ (Only in the paid PRO version). Soon, Elementor AI will also be able to generate images, making it even more versatile. Please refer Elementor AI documentation for more info.
How to Access Elementor AI Assistant?
All Elementor users can now use Elementor AI assistant. This means that if you have Elementor installed in your site, you can use this feature, but you have to make sure to upgrade your Elementor plugin to 3.13 and up. Even if you own an Elementor Pro account, you have to update your Pro version to 3.13. The AI generation is done through Elementor servers so you should first connect your site to their system. Keep in mind that this feature is still a Beta release so there could be bugs when using it. You also have to worth within the account wide prompt quota.
Once your plugin is updated and the your Elementor account is connected, you can try the all new Elementor AI assistant feature. If you are using the free version then you get a free trial. In the Elementor page builder interface you will see links to open the AI assistant. If you don’t see them, double-check whether you are connected to your Elementor account and whether you’re using an updated version of Elementor.
How to Write Text with Elementor AI?
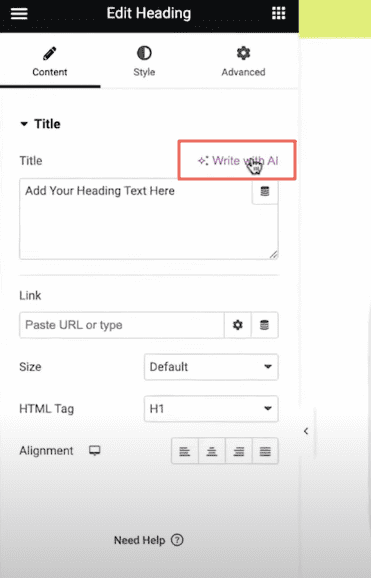
Once you’ve updated to Elementor 3.13, you’ll notice in the page builder that every control that allows you to insert text now has the option Write with AI above the text widget. But note that after you try it out for the first time, the Write with AI text will be replaced with the Elementor AI icon (an icon with stars).
You can write both headlines and long descriptions. If you click on the AI icon on a heading text widget, a new window will open. Here, you can type in your prompt and generate new text. It also suggests some useful prompts to generate the type of text that will be useful. For example,
Write a catchy slogan about….
Write an engaging introduction about…
Write a paragraph about….
Write a call to action about…., etc.
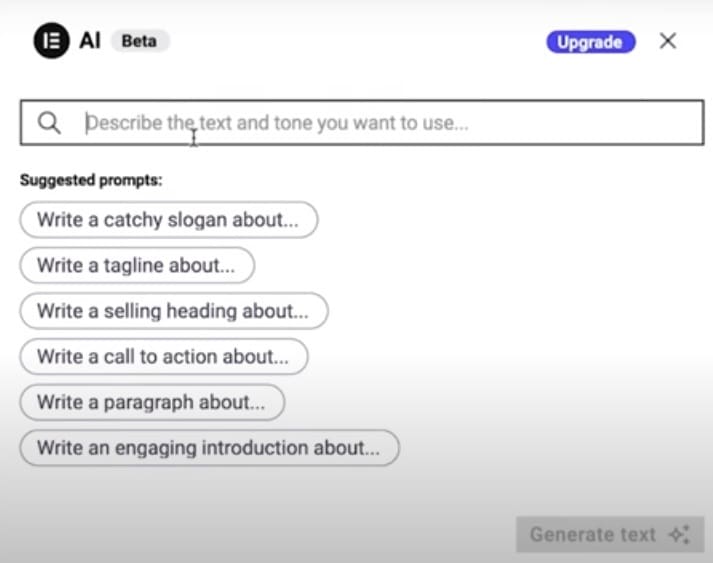
You can start by selecting one of these suggested prompts and edit it. You can also type in your own prompt. This AI is context-sensitive, so it can automatically suggest text that fits the widget you are using it on.
Text Elementor AI generates will depend on the prompts you use. If you use a descriptive prompt, describing what exactly you want, you will get better results. For example, instead of a brief prompt like “write a description about our company’s new eco-friendly reusable water bottles,” a detailed prompt like “write a product description for our new line of eco-friendly reusable water bottles. Highlight the unique features of the bottles, such as their BPA-free construction and leak-proof design and emphasize their environmental benefits. Use a friendly, approachable tone and keep the description under 150 words” will give you better results.
Elementor AI doesn’t just generate new text, it can also edit the text you have written. Once you have inserted your own text into a text widget, it will automatically show up in the AI window. AI Assistant gives you several options for this text: you can simplify the language you have used, make the text shorter or longer, and fix your spelling and grammar errors. With this AI tool, you won’t need another plugin like Grammarly to check your writing. More interestingly, you can also change the tone of your writing. You can make the text sound friendly, professional, casual, straightforward, inspirational, etc.
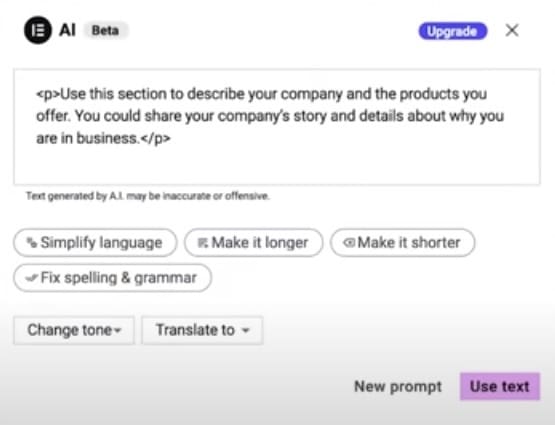
Another great option with this AI tool is the ability to translate. With a click of a simple button, you can translate the text you have written into another language. Currently, Elementor offers 29 languages, including Arabic, Chinese, Czech, Danish, Dutch, English, Finnish, French, German, Greek, Hebrew, Hindi, Hungarian, Indonesian, Italian, Japanese, Korean, Malay, Norwegian, Polish, Portuguese, Romanian, Russian, Slovak, Spanish, Swedish, Thai, Turkish, and Vietnamese.
Once you have selected what you want to do with your text, you can click on the Use Text button at the bottom of the window. If you are not happy with the text you have written, you can also choose to create a new AI-generated text with the New Prompt button (which is next to the Use Text button). Read the full documentation on how to use this.
How to Generate Code Snippets Using Elementor AI?
When using a WordPress theme and a page builder like Elementor, you will need to write your own code to add customizations for your site. These are things that can not be accomplished with the default WordPress theme or page builder setup so you have to write your own code hacks or hire a developer for help. Typically theme or the page builder you use allow to add/hook custom functions in to different areas of your site like the Header, Footer, the Body area and so on.
With Elementor AI assistant, you now have the ability to generate custom code snippets for various needs. Gone are the days of searching for code snippet tutorials to get something done. You can also ditch plugins that add small code hacks to your site. Elementor AI generated code snippets are specifically designed to work with Elementor environment so chances of them breaking your site is minimum. To use this feature go to Elementor > Select Custom Code and Add New. You will see ‘Write me code’ button just next to Location. When you click on this button, it will open the AI prompt input window. Describe the function you want to achieve. You also get some suggested prompts like, Write an embed code for Facebook Pixel, HTML code that embeds the following PDF into a webpage: link to PDF, Iframe code to embed a Spotify widget on the web page etc…
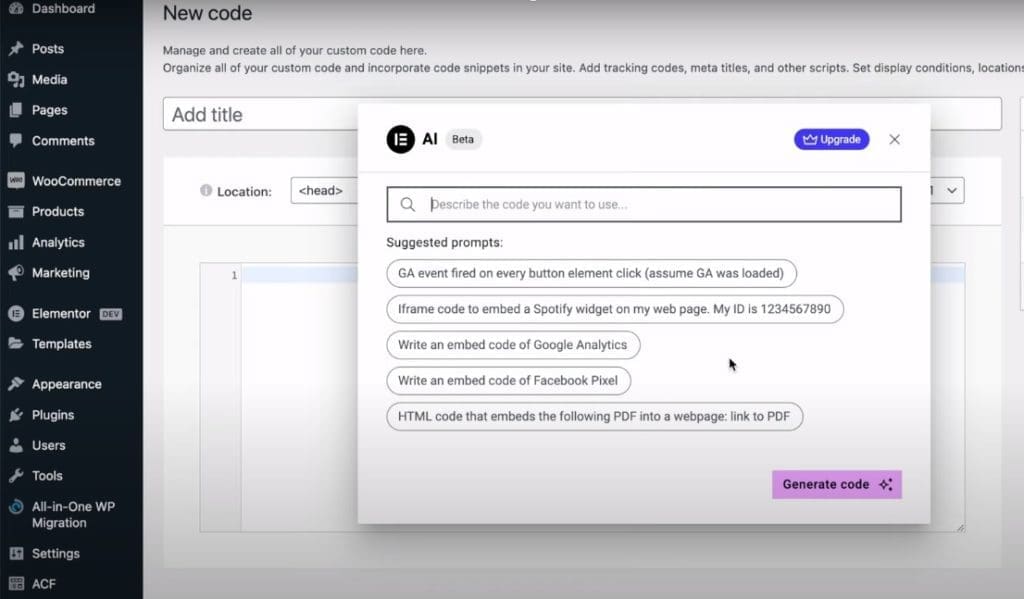
You can also type in your own prompt. For example, you can type in a prompt to remove all the screen options normally available on a WordPress Dashboard. Now click on Generate Code. The AI will generate a code snippet for you within seconds.
How to Add Custom CSS to Elements?
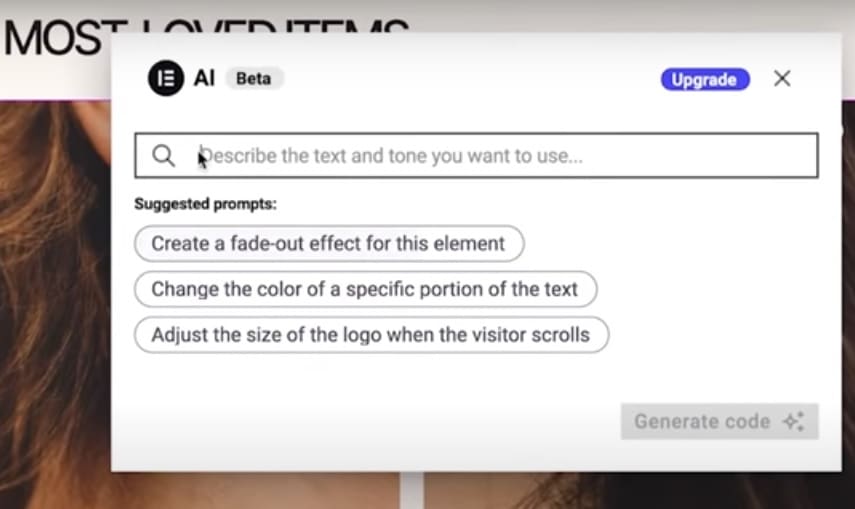
To use AI to generate custom CSS to elements in the page, first, select the Elementor widget you want to make CSS changes. Then go to the Advanced tab of the widget and choose Custom CSS. You will see a button saying ‘Code with AI’ – Click on it. This option too gives you some suggested prompts like, Create a fade-out effect for this element, Change the color of a specific portion of the text, Adjust the size of the logo when the visitors scroll etc…
Alternatively, you can also type in a prompt to describe the change you want to achieve. For example, you can,
• Add hover effects – change the color or opacity of a widget when a user hovers over it.
• Use animations – add movement or transitions to your widgets to make them more visually interesting.
• Change the background color or image of a widget.
• Use border and padding properties to give widgets a more defined or spaced-out appearance, etc.
Once you have described your requirement to the AI, all you have to do is click on the Generate Code button at the bottom right corner. Elementor AI will automatically generate the CSS code for you. Then click Insert to add this code to the widget.
If the code you inserted doesn’t give you the results you want, you can delete the code and generate a new code using a different prompt. You have to do trial and error in order to get the exact result you want.

Here are some best practices you need to keep in mind when using this feature,
• Always save and back up your page before adding custom codes generated with Elementor AI.
• When adding custom CSS to a specific element, include the word “selector” in the code to avoid affecting other parts of the page.
• If you use Elementor AI to regenerate code without inserting it, the previous code will be overwritten. Keep a copy of the previous code in a separate document if needed.
• Be careful when inserting multiple snippets of code, as they may conflict with each other.
• In some cases, the generated code may not be perfect and may need tweaking.
• Elementor support team does not offer help for these AI generated codes. It is the user’s responsibility to check and debug code produced by Elementor AI.
Things to know before using Elementor AI assistant
- Elementor AI sometimes generates text that isn’t accurate or text that’s completely made-up due to what is known as AI hallucinations. This happens when an artificial intelligence model, such as a language model, creates content that appears to be logical and coherent but is not based on factual information. These hallucinations can take the form of false statements, incorrect data, or even entirely fictional scenarios.
- If you’re planning to use custom CSS or custom code with Elementor AI, it’s important to note that these features are only available in the Elementor Pro version. But AI writer is available to Elementor free users as well.
- Elementor AI subscription is linked to your Elementor account and are not specific to a website or license. This means that you can use Elementor AI on multiple websites that are connected to your account without any additional charge.
- During the free trial of Elementor AI, users are only given with a limited amount of free-generated content. This means that you will get a prompt quota. But if Elementor AI cannot generate a prompt you gave, it will not use up any of your quota of generated content.
- When you see a “Bad Gateway” error message while trying to send a prompt to Elementor AI, it means that there was a problem with the server or the connection between your computer and the service. This error can occur due to issues with your internet connection, browser, or computer’s settings.
Conclusion
Elementor AI is a powerful addition to this popular WordPress page builder. Combining the worlds of AI with website building, Elementor AI assistant can help you save time and effort on various tasks, including content writing and coding. The AI can generate text, create custom CSS for elements, and create custom code for the site. It can even translate text into many different languages. If you’re an Elementor user, make sure to upgrade your plugin to version 3.13 or higher to try Elementor AI today.