WordPress migration plugin: Migrate WordPress site to a new hosting
Table of Contents
Hello guys!! Today I finalized one of my WordPress web design projects and finally moved the site to the client’s server from my computer(localhost). So, I thought why am I not writing a tutorial for beginners to do it themselves. Let’s see how to migrate the WordPress site easily with one of the best all-in-one WordPress migration plugins: the Duplicator.
OK, let’s dive in.
Step One: Install the WordPress migration plugin on your website.
I am going to teach you the easy way to do it. There are a few other ways too. But this is what I prefer and what I always do. I am using the plugin called ‘Duplicator‘ from Snap Creek. The free version is more than enough to move a WordPress site from localhost to a live server. If you are dealing with huge sites, you can consider upgrading to the pro version.
Go to the dashboard and Plugins > Add New. Then search for ‘Duplicator’. Remember the icon. The cogwheel. :). When it appears just click on the ‘Install’ button.

Once installed, go to Duplicator > Packages and create a new package. A package is a copy of your website. So we need to create a package to migrate it to a new place.
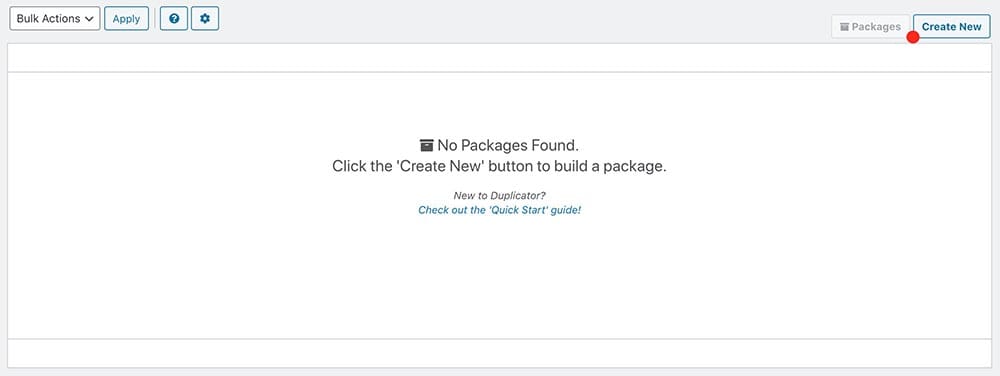
You can rename your package at the first step. I always use the date and the site name. So you know when it was created.
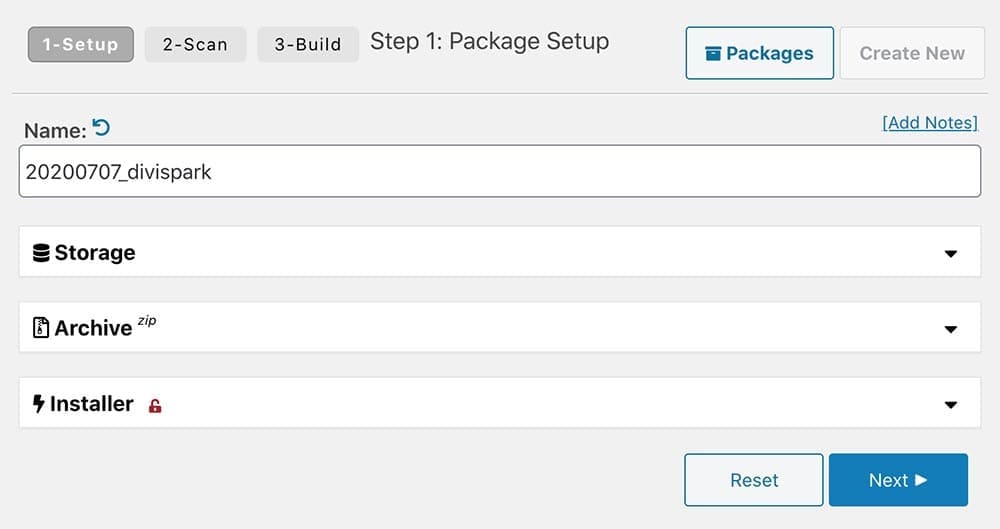
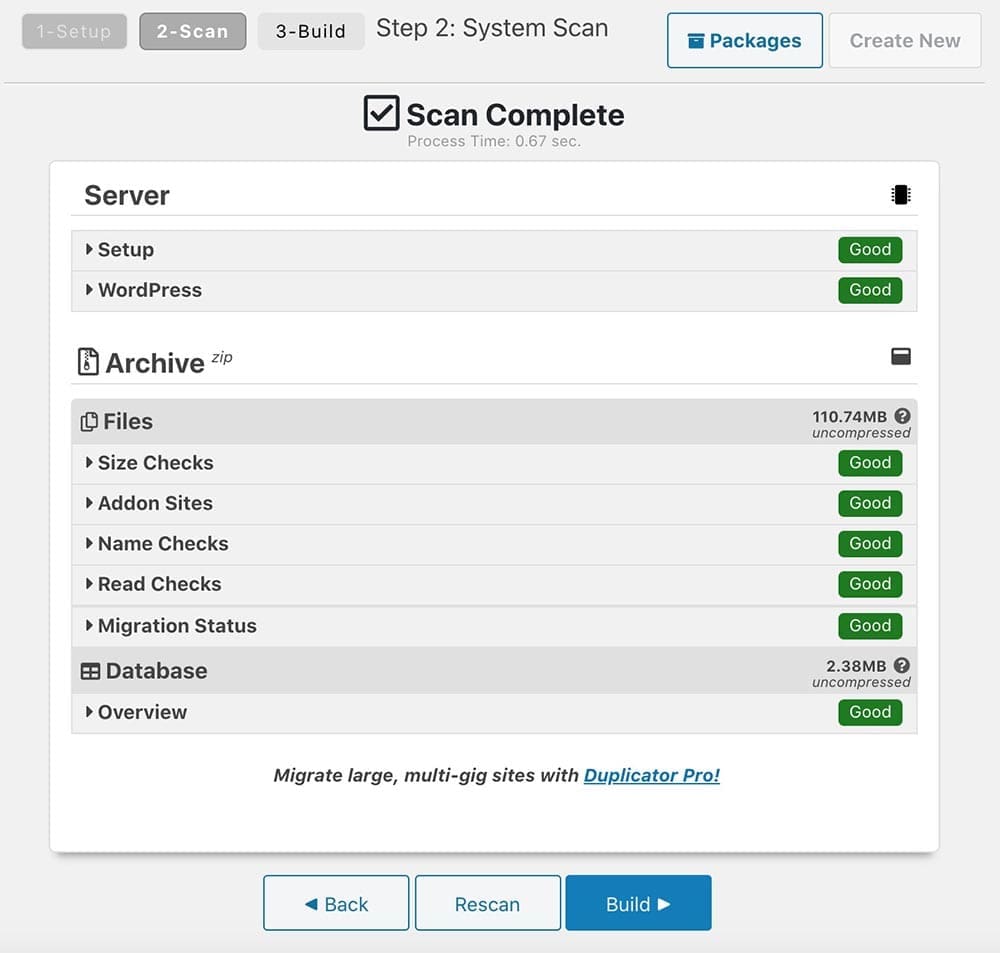
Then you will see the report. If all is good you can click on ‘Build‘.
OK, you have just created the backup file including the database. Download these two files. (just click the ‘Installer‘ and ‘Archive‘ buttons and save them into a folder on your computer.)
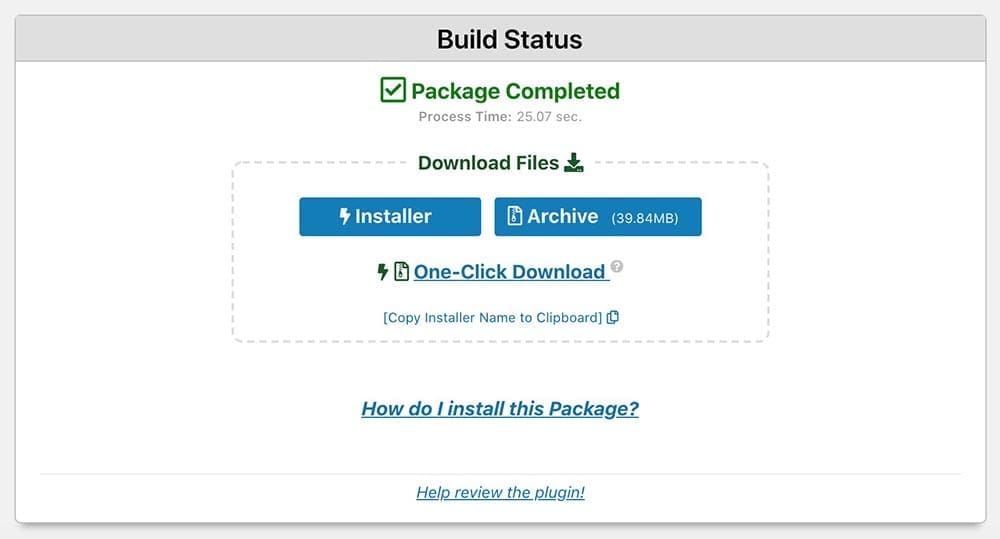
Great, you are done with the first step. Let’s move our WordPress site to the live server now.
Step Two: Upload your files to the server
OK, now we are going to migrate the WordPress site to the live server. In this case you need to access your server to upload files (Those two files we downloaded in the first step) and we need to create a new database.
So, you can go to the Cpanel > File Manager and upload those files to the Public HTML folder. Another way is to use an FTP client like FileZilla and upload files through FTP.
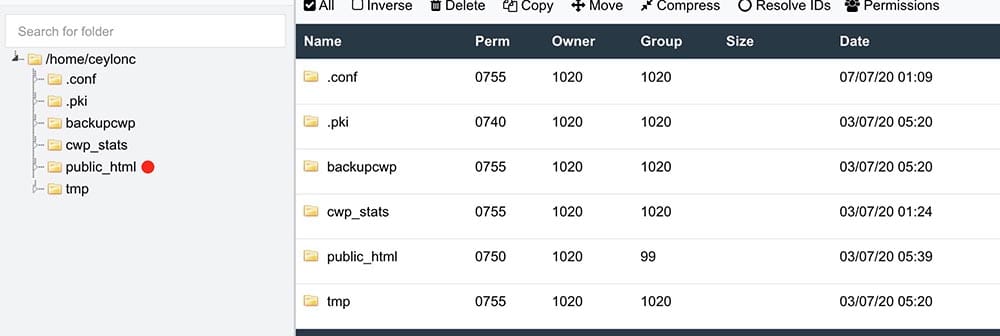
However, you should be able to access your files with your domain. example: www.your-webiste.com/installer.php
Next, create your database. Go to phpMyAdmin and click on New.


give a name to your database and click on Create
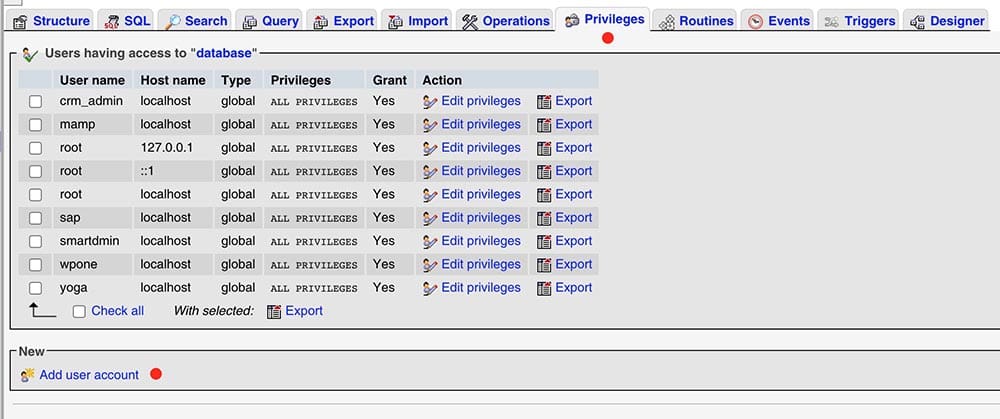
Now we have to add a user to the database. Click on the Privileges tab > New > Add user account
Now create the new user and grant all privileges to the newly created database. Click on the ‘Go’ button on the bottom right corner.
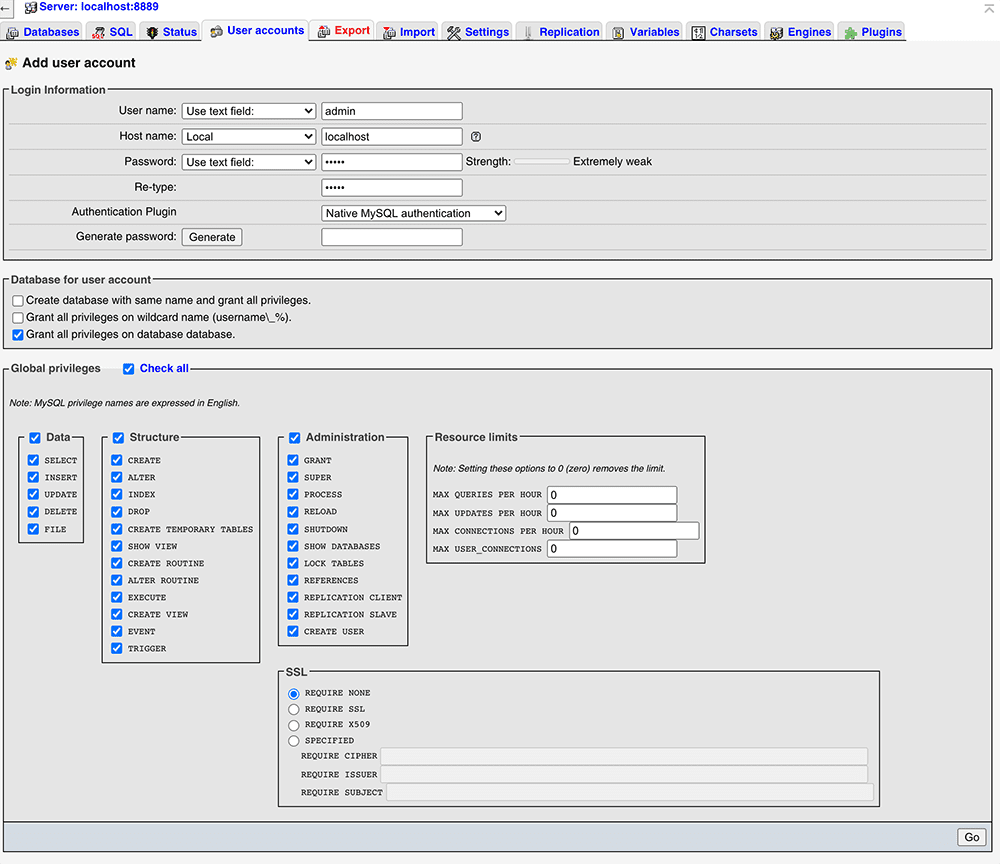
Done. Let’s start the migration.
Step Three: Migrate WordPress site
Now open your browser and go to www.your-website.com/installer.php. It will open the installer like in the image below. If you did everything as I said and if all is good it should say ‘Pass’ for ‘Setup’ and ‘Validation’.
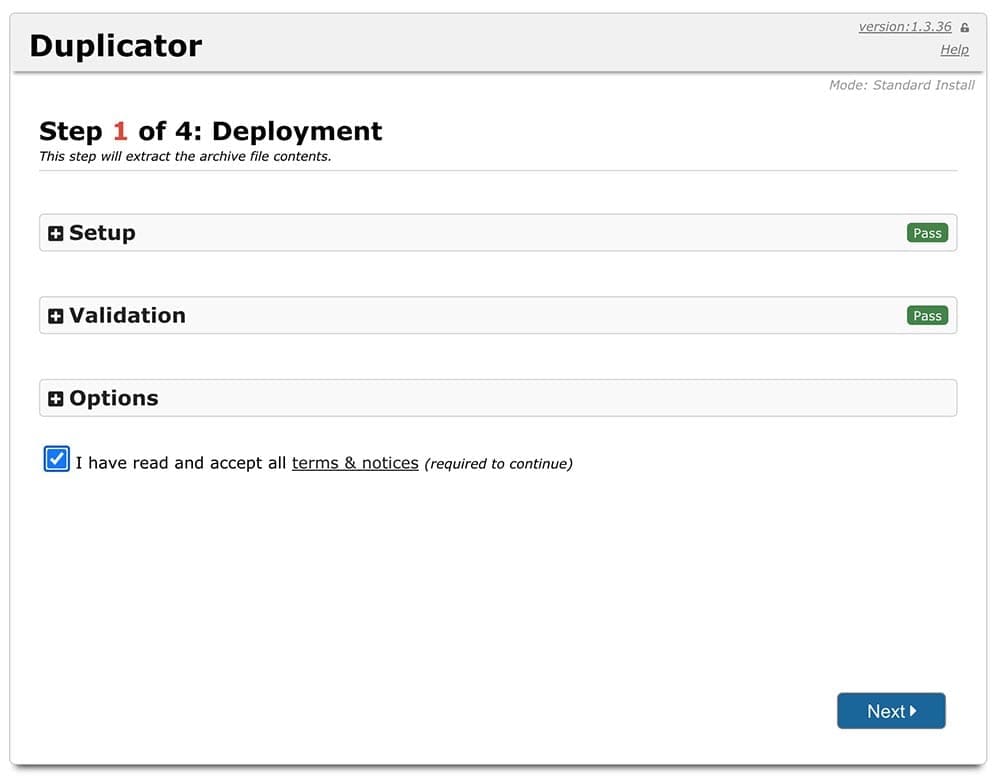
Accept all terms and notices and click on the ‘Next‘ button. it will start to extract the archive file. Once done, you have to connect your database. Enter all details here for the database you created previously and click on the ‘Test Database‘ button to check the connection.
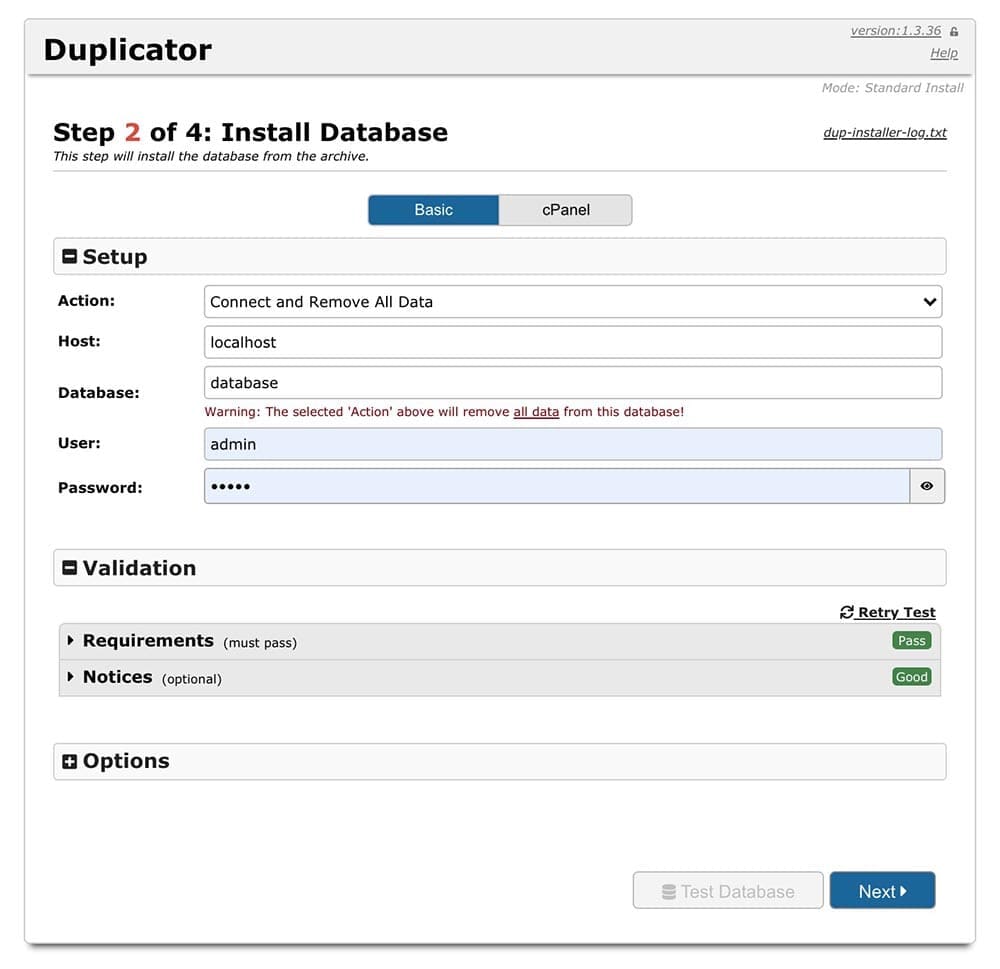
If there’s no error click on the ‘Next’ button. Just click on the ‘Next’ in the 3rd Step. It will connect our database to the site. You will see the below screen as the final step. That means our site migration was successful.
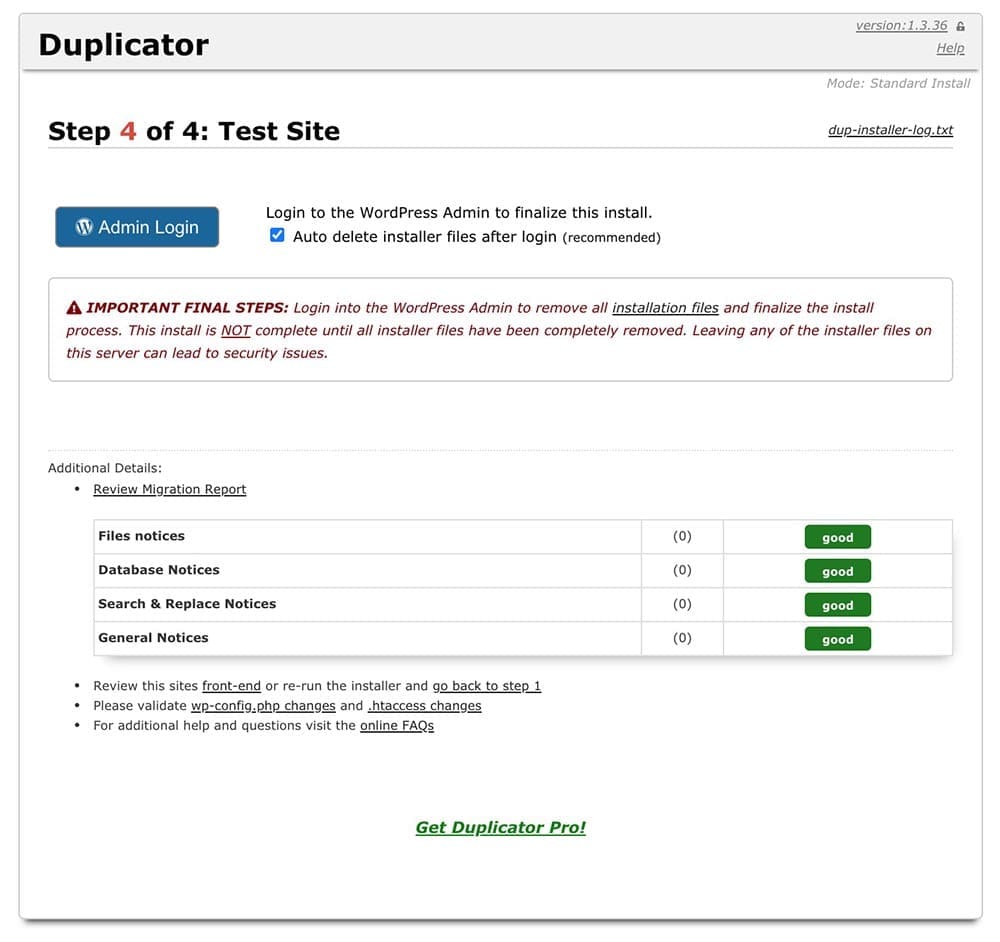
Congratulations!! That’s how to migrate your WordPress site with one of the best WordPress migration plugins without much effort. But, once you have done with the migration, don’t forget to log in to the website through this ‘Admin Login’ button. It will automatically delete all files used while installation. (This is a must. For your website security).

