How to start a blog in just 5 steps
Table of Contents
Are you looking to start your own blog? But don’t know where to start? Don’t worry, I am going to teach you how to start a blog yourself. Just in 5 easy steps. This will take about 30-40 minutes to complete. So, you are going to have your own blog in 30 minutes. Let’s dive in and see how you can start blogging in less than one hour.
What you need to start a blog in just 5 steps
- Domain name idea for your blog. Something like diywithwp.com
- Hosting Account
Lets start
Step One: Secure Your Domain Name and Host
The domain is the address you type in the browser’s address bar to visit your blog. Without a domain, there’s no way to access or view your website.
Hosting is where you save all your files related to the website or blog. Which you can access with the domain name.
To get the domain and hosting you have a ton of different options to choose from. But my suggestion is to go for BlueHost. One of the most established, reliable companies and an official WordPress recommended hosting provider.
Get your domain for FREE!
With BlueHost, you can get a free domain name with your hosting package. (For the first year). Typically, a domain name costs you around $14.99 a year.
Buy your hosting package with 60% discount
Normally you have to pay $9.99 per month to have a hosting package with BlueHost. But fortunately, you can get a 70% discount and get your hosting package for just $2.95/month with the link below.
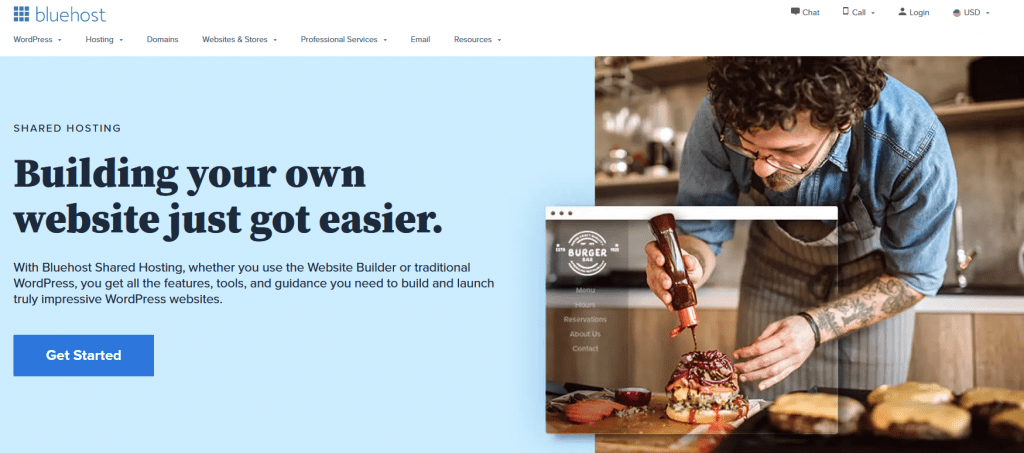
Once you go to the link, you will see the following screen. Just click on the ‘Get Started‘ button.
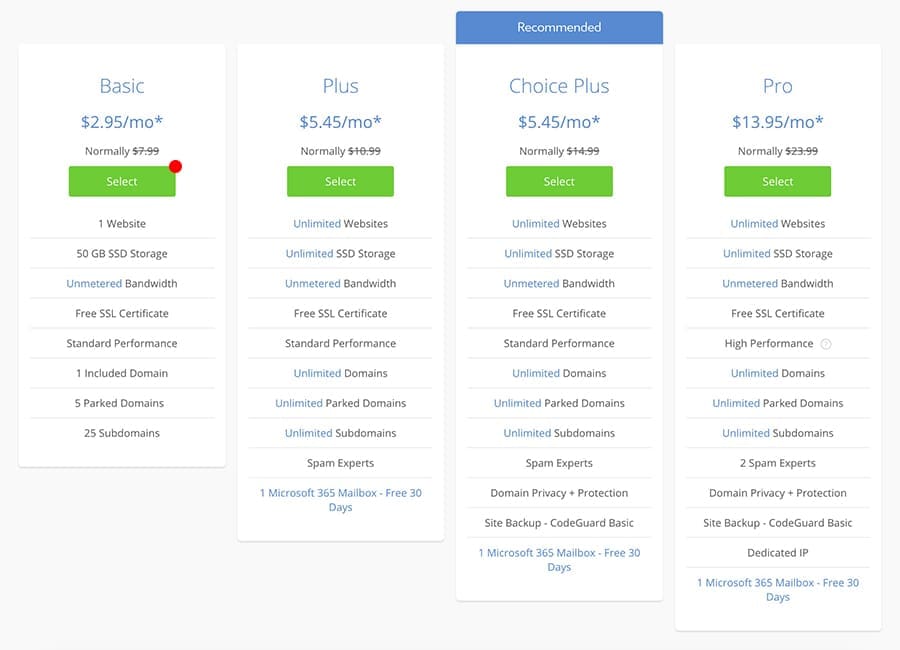
Choose your hosting package to start your blog
On the next page, you have to select your package. the ‘Basic’ one is more than enough to start with. If you are planning to run more than one website in your hosting package, I suggest you choose the ‘Choice Plus’ package instead. Best value for the money.
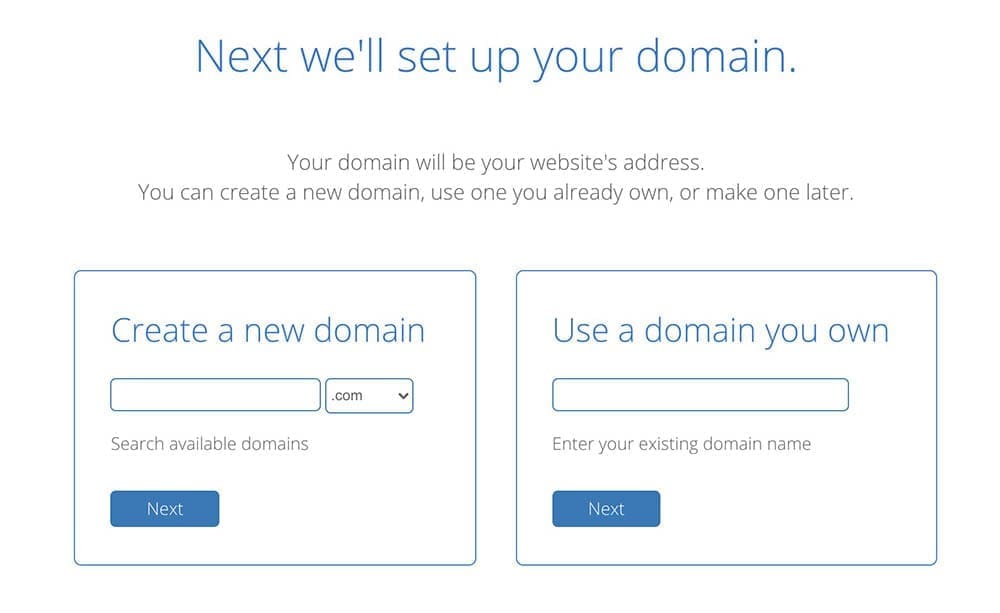
Pick your domain
In the next step, you have to pick your free domain from Bluehost. Search the blog name you already decided inside the ‘Create a new domain‘ section. Enter the domain name inside the input field and click ‘Next’.
If you already own a domain name enter inside the ‘Use a domain you own’ section and then move forward. You can use your own domain which you have bought from another seller but change DNS settings there to point/link your domain to the BlueHost account which we are just buying at the moment.
Create your BlueHost account
Create your hosting account by providing the necessary information on the next screen. All BlueHost hosting packages have everything you need to start your blog right away. Below are what you will get with all packages.
- Free domain name
- Unlimited Bandwidth
- Free SSL certificate
- Easy cPanel dashboard where you can install WordPress with just a few clicks
- Branded email accounts. Similar to [email protected]
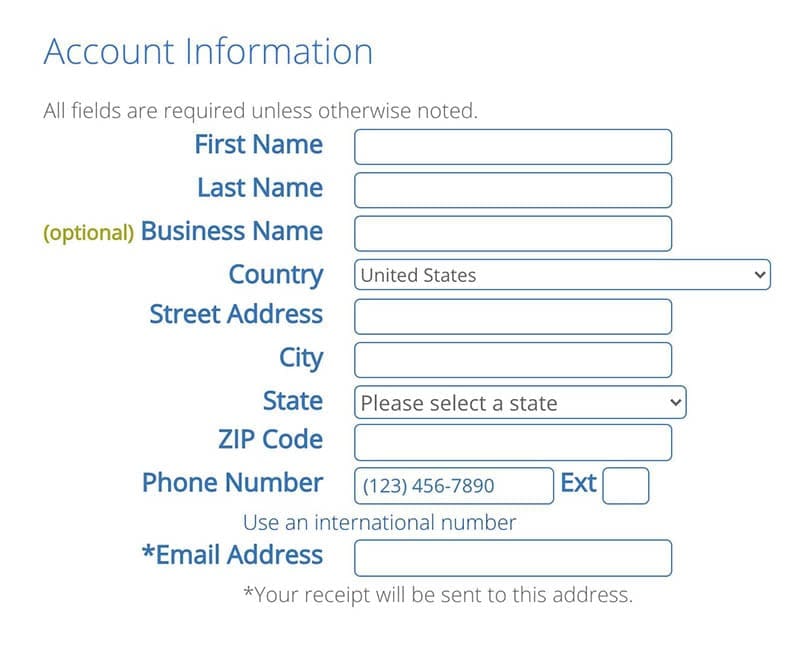
Account information
Fill all fields with your personal information.
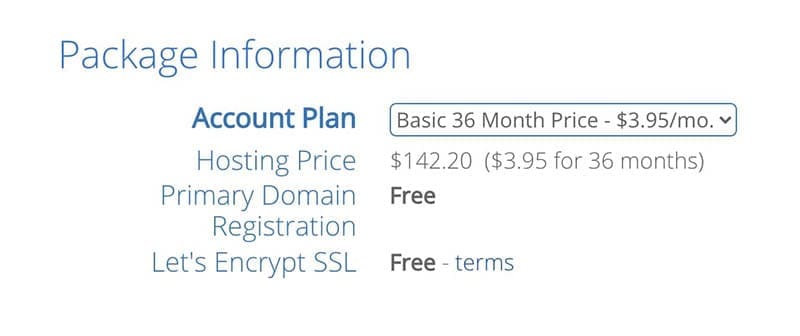
Package information
Here you can select your account plan. The best deal is to register for 36 months (for 3 years). So, you can get the full discount.
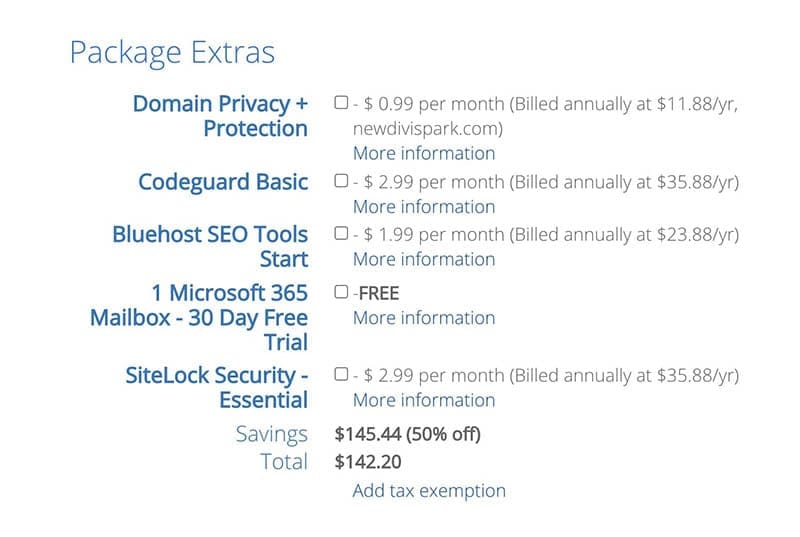
Package extra
Here are some additional products which you can add to your package. If you wish to have any of these you can add them now. If not, don’t worry, You can add them later whenever you decided to. So, I think it’s better to move forward without any of those to keep the cost lower.
Once you fill out all information make the payment and complete the order. Then you will have to set your account on the next page. (Screenshot below). Click on ‘Create account‘ and set your password.
You will get an email from BlueHost to verify your email address. Don’t forget to verify the email address.
Done! you have successfully completed step one. Now you have a domain name and web hosting. Congratulations!! Let’s see how to start a blog now.
Step Two: Install CMS (Content Management System/WordPress)
What is WordPress
we are talking about WordPress.org, the self-hosted version, not WordPress.com. WordPress.com is the paid version and is very limited in some areas. WordPress.org on the other hand is free and has a lot of room to expand your website.
WordPress (WP, WordPress.org) is a free and open-source content management system (CMS). It is the web publishing software you can use to create a beautiful blog. WP was a blogging platform at the start but now it’s more than that. You can use WP for any kind of website. The important part is WordPress is very beginner-friendly. You no need to be a techy person to use WP.
Ok, just go ahead and log in to your Bluehost account to install WordPress.
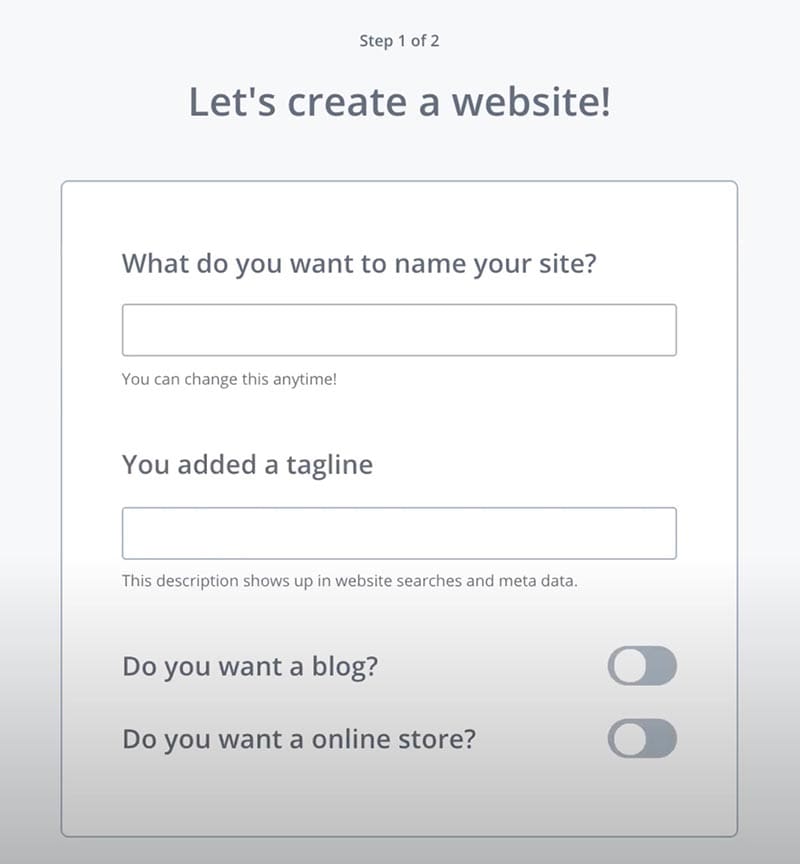
Give your website name, tagline, and answer all the short questions about your website in the next step to continue.
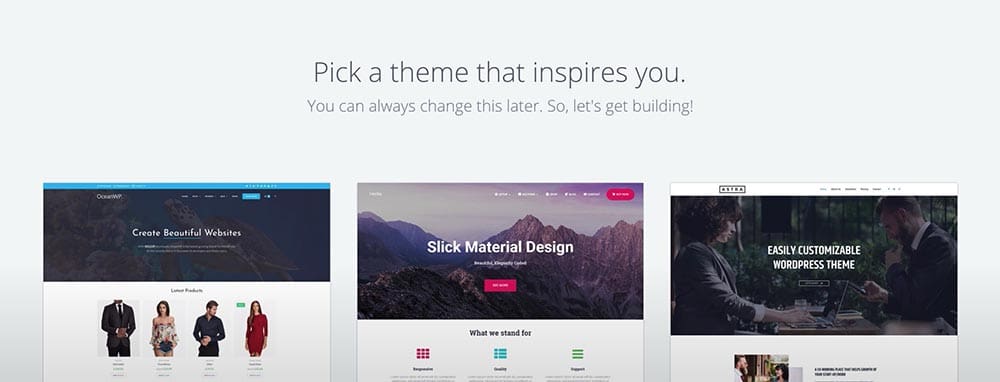
You can skip the final step where you have to pick a theme. Basically, they are asking you to pick a theme for your blog. The theme is what style your websites look and its functionality. Just skip it for now.
Step two is done! 🙂
Step Three: Choose your blog theme
Login to WP dashboard
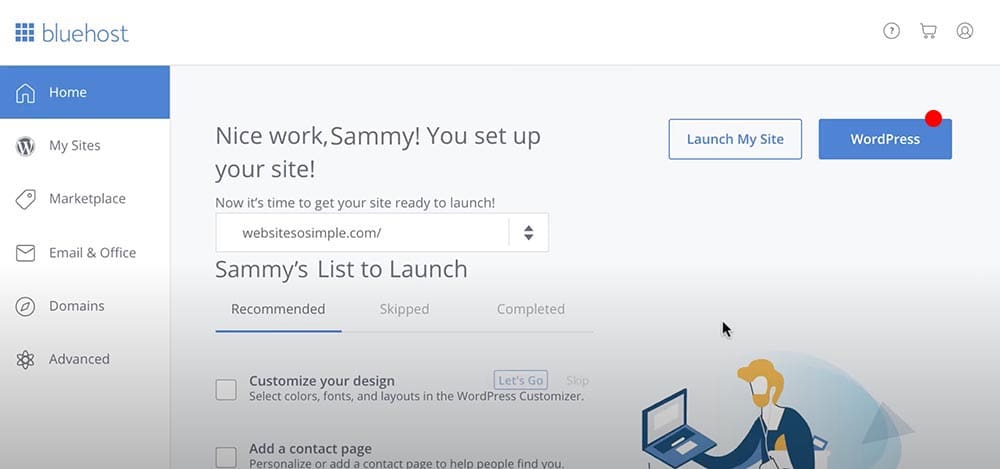
Click the ‘WordPress‘ button on the right top corner to log in to your newly installed WordPress site. (Bluehost has made the process easier and they just installed WordPress for us. Otherwise, we will have to install it manually through cPanel)
Below is your WordPress dashboard where we can edit our website.
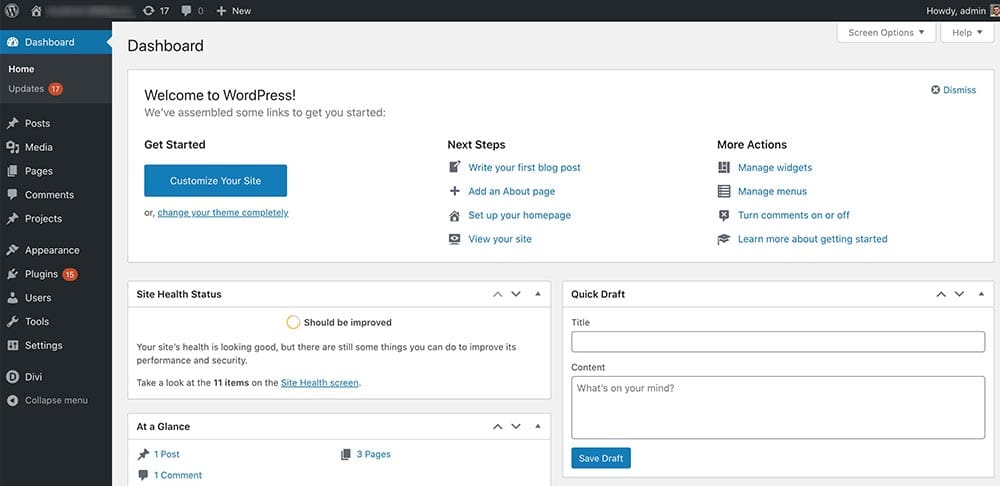
Believe it or not, you already have a decent-looking blog. Just visit your website front-end (WordPress dashboard is our website’s backend) to see it yourself.
Not bad, right?
How to change the WordPress theme
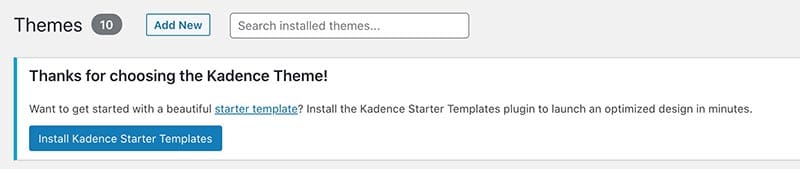
The theme is what decides your website’s look and feel. Also, the functionalities which we can extend with plugins. (Will talk more about plugins later). There is a huge collection of themes that you can select from WordPress.org. In this tutorial, we are using a free theme called Kadence from KadenceWP. Honestly, this is the best free theme I have ever used for a blog. Personally, I love this one. So, I am sure you will love it too.
Just click the Free download button on the menu. You will get a zip file that you have to upload to your website.
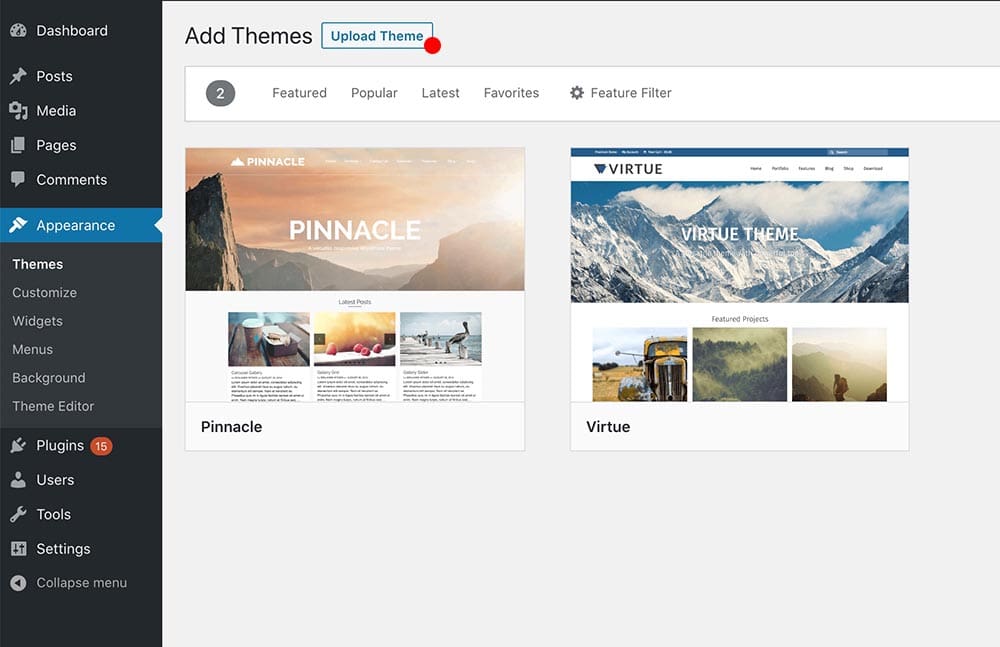
Now go to your website Dashboard > Appearance > Themes and click on the Upload Theme button on the top. (See the screenshot below). Then select the file you just downloaded (kadence.zip) and install it. You can activate the theme once uploaded by clicking the ‘Activate’ button.
Kadence provides us with nice starter templates which we can use on our website. Go ahead and install them. These are very useful when creating our inner pages.
Let’s visit our website and see how it looks like now. Just type your website URL in a new tab.
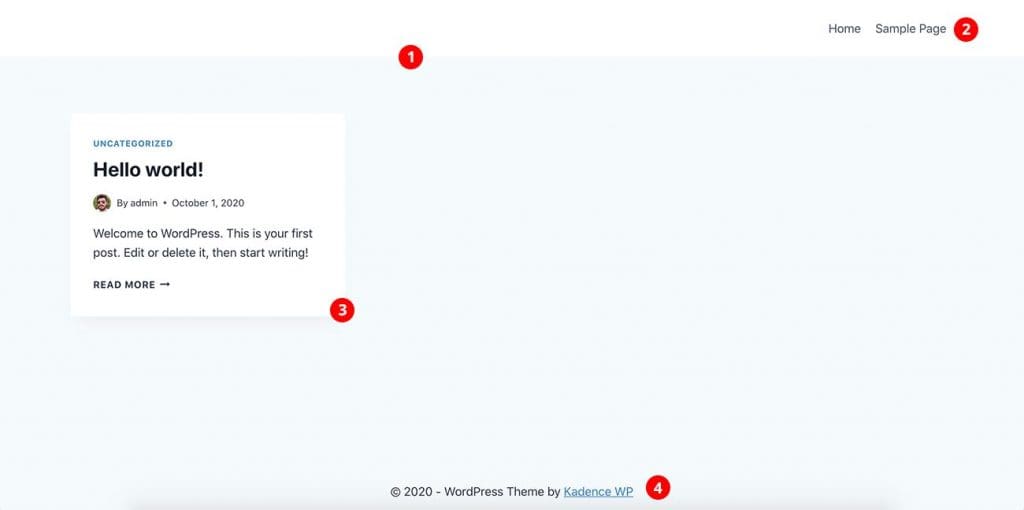
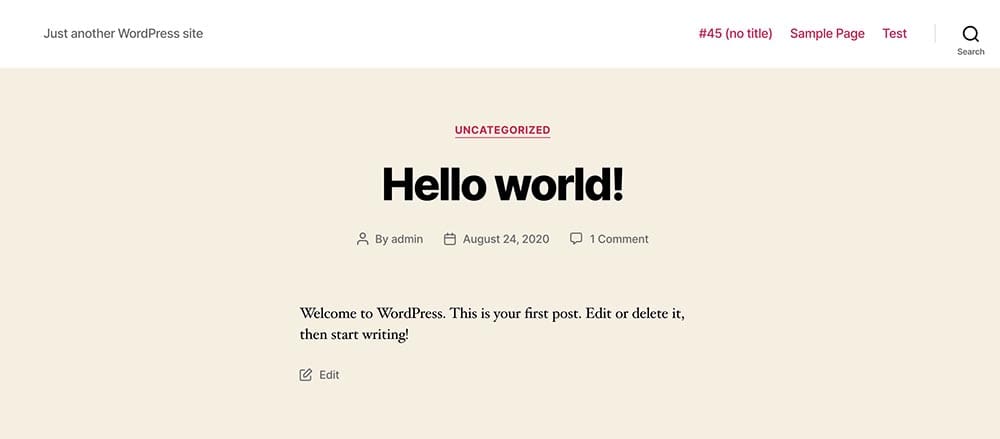
Here is your home page at the moment. By default in WordPress Home page is where shows all your latest posts.
What you see in the screenshot:
- Header
- Menu
- The latest post in the grid view. We just have the sample post which comes with WordPress installation at the moment.
- Footer
Looking good. right? 🙂 We can make it great. Just follow the other simple steps.
At this point, we have our blog running on the internet. But still, it’s not exactly what we were looking for. We have to style it to match our personal branding.
Add your logo to the header
Go to the dashboard and Appearance > Customize > Header > Logo and upload your logo. Play with other settings and try to make it looks nicer on the header. You will see the live preview of your changes on the right side of the customizer.
There are a lot of things you can try in the customizer to make it looks better. Go ahead and try some styling yourself. Feel free to comment below if you need any help.
Change the color pallet
Go to Appearance > Customize > General > Color to set your color theme.
Theme Typography
The next step is to set your theme’s font styles. Go to Appearance > Customize > General > Typography and set your title font and body font styles. You can choose any free Google Font from the list.
There are a lot more other settings that you can play with. Check them all and try to understand how things work in WordPress customizer. Once you got the point it is really easy to move forward. WordPress is a user-friendly CMS and that’s the main reason for its popularity.
Step Four: Add your first blog post
Let’s create our first blog post. Go to Dashboard > Add New. Below is the post-editing screen you will see.
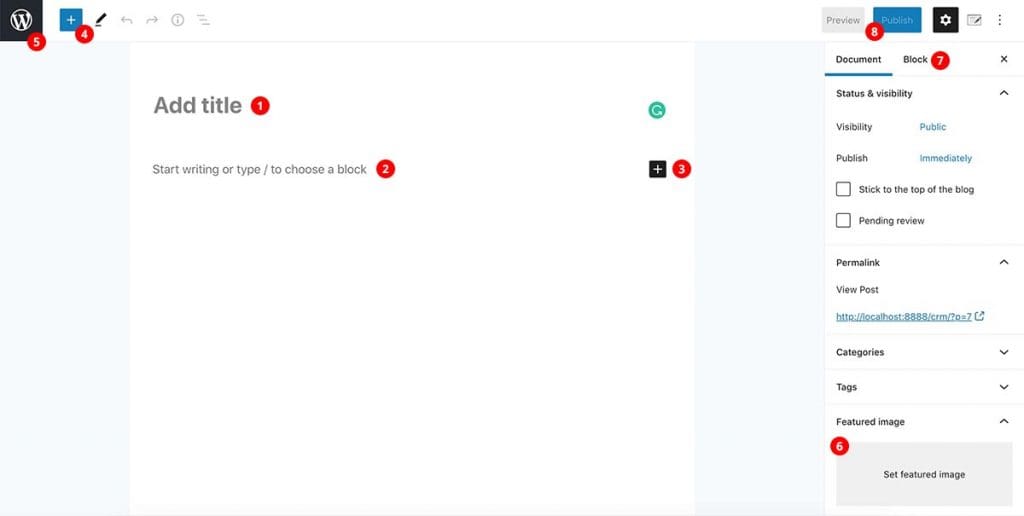
1.Post title
Add your post title here
2. Post content
You can write your post here.
3. More Gutenberg blocks
By clicking on the ‘+’ icon on the right corner you can add other blocks. Gutenberg Blocks are something we can use to build web pages in the WordPress world. It’s basically a page builder with a lot of blocks/modules. As an example, if you want to add a text in the post or page, you have to add a Text Block. If you want an image you have to add an Image Block.
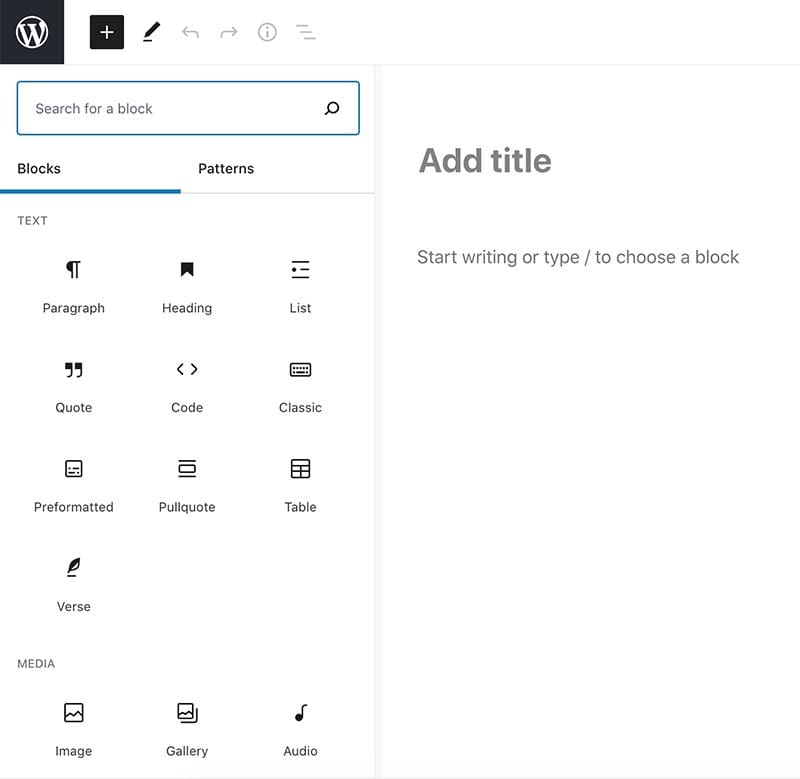
4. Gutenberg blocks
You can see all available blocks here.
5. Back button
Click this button to go back to the All Posts view.
6. Featured image
This is where you can add a featured image to the post. You can upload your image. Always try to optimize the image to its best. Try to make it as smaller in size as possible as you can. Use a tool like ImageOptim(for Mac) or FileOptimizer(for Windows) to optimize your images. TinyPNG is another free online solution to try.
7. Block related settings
Here you can find settings related to the blocks you add. Try yourself.
8. Plublish button
By clicking this button you can publish your post to the world. 🙂
WordPress Settings
There are a few other important settings we need to check before moving forward. Go to the Dashboard > Settings > General. You can set the Site Title, Tagline, Admin Email, and a few more settings here.
Permalinks
Permalinks are the permanent URLs to your individual posts, as well as categories and other lists of blog postings. A permalink is what another blogger will use to link to your article. Also, this is a really important part of search engine optimization.
Go to Settings > Permalink Settings

Select ‘Post Name‘ or another better version as the permalink structure.
Step Five: Design a custom home page
At this point, you have a fully functional WordPress blog that you build yourself. Happy? 🙂
By default, WordPress shows the latest posts you publish on the home page of your blog. It’s enough in some cases but what if you want to have a cover image with a title on the top of the page and a few latest blog posts below? A call to action section with a button to the contact page? Let’s dive in and see how to do those kinds of things.
Let’s add a new page. Go to Pages > Add New. Give your page a title. I name the page as ‘Home’ as we are going to use this as the home page of our website.
Create a cover section which attracts your readers
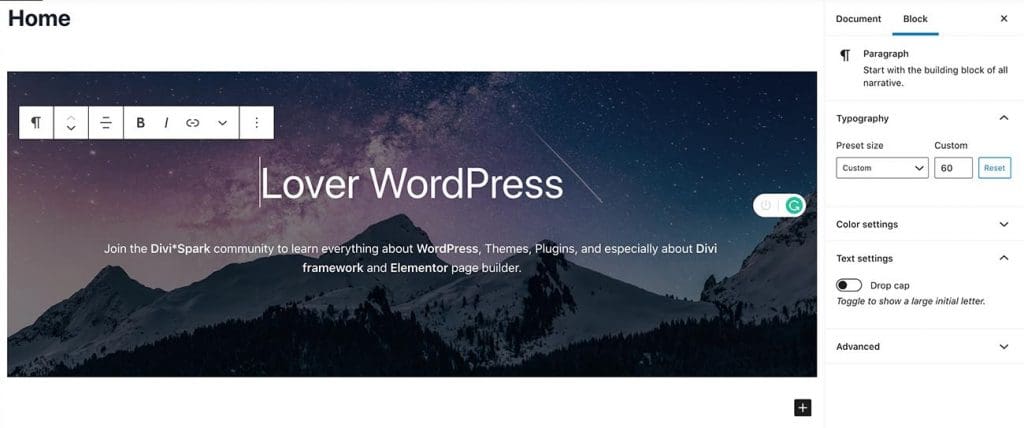
The page editing screen is very similar to the post editing page. It is using the same Gutenberg builder to design the page. Here, on the top, I am going to add a cover with a title, description, and a button. Just click on the ‘+’ icon and search for ‘Cover’.
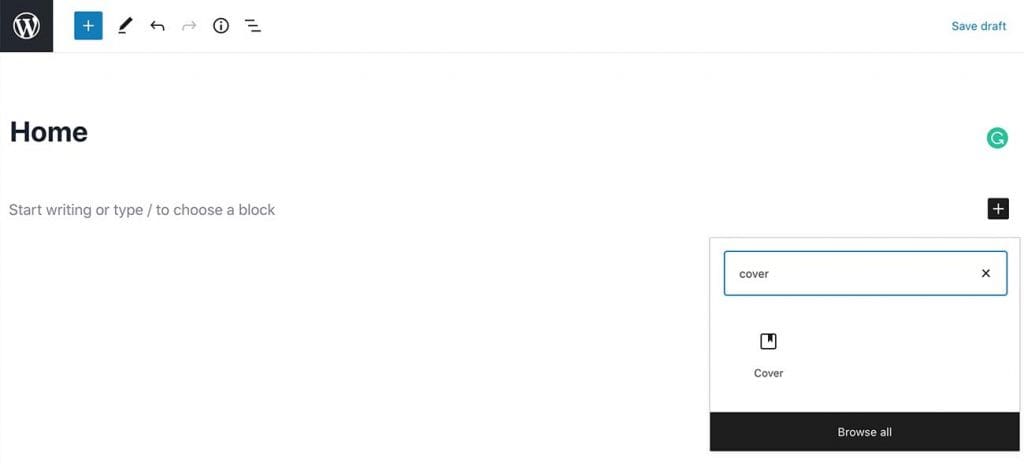
Below you can see what I did in my demo. As you can see on the right side you will get different settings for each block. So you can change the font sizes, colors, background images, etc.
How to show latest posts on the home page
Now we are going to show the latest posts on the home page. Similar to what you did above, just search for ‘Latest Posts‘ and then add the block to the page just below the cover section.
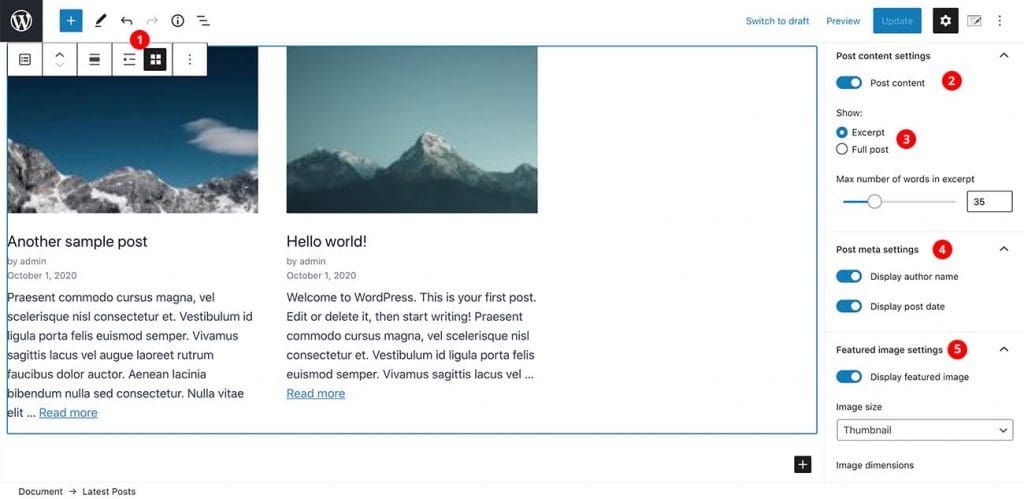
The Setting you can change:
- You can select the list view or grid view here. I have used the grid view.
- It will only show the title at first. You have to enable here the post content.
- Select ‘Excerpt’ and excerpt length.
- Display author name and date.
- Here you can decide whether to show the featured image as I have shown in this example.
That’s it!
Add the Call To Action section
As you can see it is really easy to design a page with the Gutenberg page builder. You can add any type of content there. Go ahead and add a title and a button below which will redirect to the contact page. We can add the contact page URL later as we don’t have the contact page yet. Below is what I did.

Great!! we just finalized our custom home page design. You can add any content you want. Just try yourself and try to do a nice design.
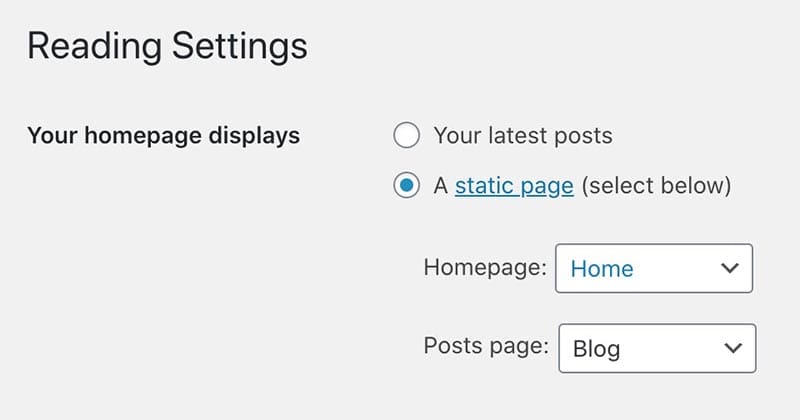
Let’s set this page as our home page. Go to Settings > Reading and set Your homepage displays to A static page and select the home page we just did. Also, I have added another page called ‘Blog‘ meanwhile. Just an empty page and I am choosing that as the blog page.
Basically, you are done creating your own blog in WordPress. That’s how to start a blog with WordPress. You can continue posting your articles without any issues. But still, there are a few must-have pages in a blog like About, Contact, Privacy Policy, Terms of service, etc. At this point, you already know how to create new pages and add content there. But you still don’t know how to add a contact form to the contact page. right? Let me tell you how to do that the easy way.
Bonus: How to add a contact form in WordPress
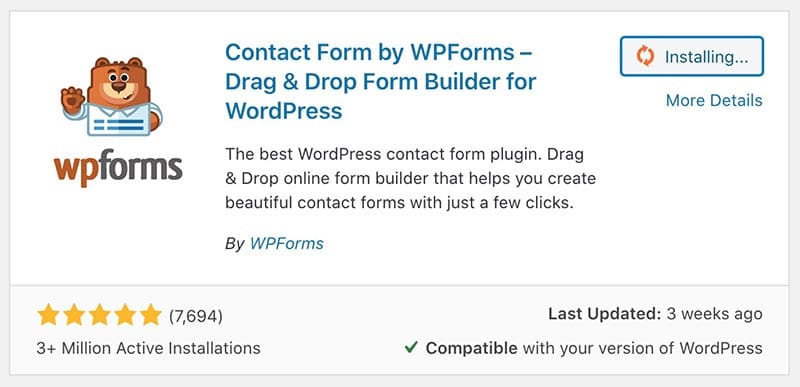
We are going to use a free plugin called WPForms to add the contact form to the page. Let’s go to the Plugins > Add New and search for WPForms. Once you found the plugin just click on Install and then Activate.
After you activated the plugin you will see a new menu item in the dashboard. Go to WPForms > Add New. Then select the Simple Contact Form on the next screen. The sample form will enough for most people but if you want to add more fields you can do with just a few clicks. It is really simple.
By default, when someone submits an email through this form it will send to the admin email address of the site. If you want to change it, just go to Settings > Notification > Send To Email Address and add the email address where you want to receive emails.

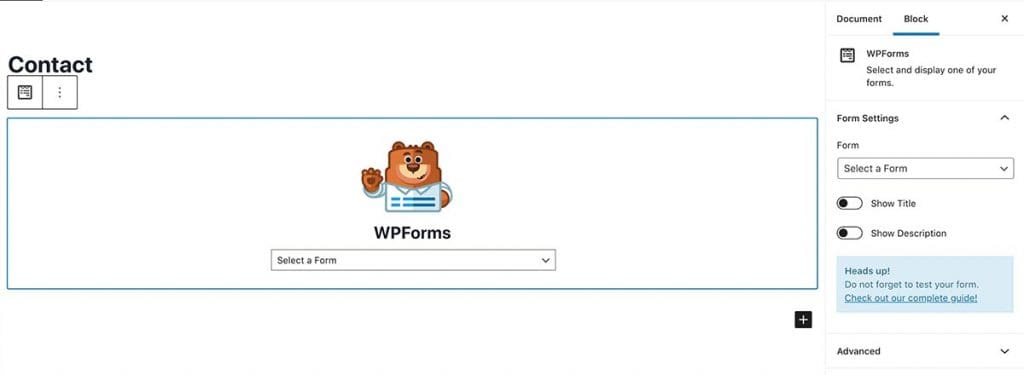
OK, we have just created our form. Now we have to add this to our contact page. Just go to the contact page and click on the ‘+’ icon to search for blocks and type WPForms. It will bring up the WPForms block. You can add it to the page and select the form we just created. That’s it!! Pretty easy, right?
So, That’s how to start a blog yourself with WordPress. There are a lot more things which you can do to make it more attractive. In future posts, I will address them one by one. Until then, good luck!