Table of Contents
The WordPress block editor, also known as Gutenberg, has completely changed the way users create content on WordPress websites. With its modern and intuitive interface, the block editor offers an efficient and flexible way to design pages and posts. It allows users to create complex layouts, customize designs, and enhance the user experience without the need for coding skills. The Gutenberg editor has a built in help system that shows what a block does when you hover over them. However, with so many blocks available, it can be overwhelming for users to know which ones to use and how to use them effectively.
In this article, we will provide a comprehensive walkthrough of all the WordPress blocks and demonstrate how to use them to create engaging and dynamic content for your WordPress website. Whether you’re a beginner or an experienced WordPress user, this article will help you unlock the full potential of the WordPress block editor. We begin with the general editor interface before delving into each separate block type.
Page/Post Settings
Before getting onto the Gutenberg page building blocks, let’s try to understand the options we have at our disposal in page/post settings panel.
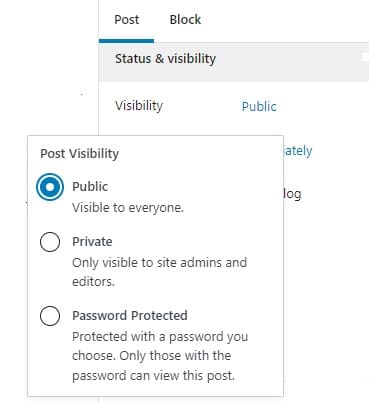
1. Visibility Option
The visibility option allows you to control who can see your post or page. You can choose to make your post or page visible to the public, which means that anyone who visits your website can view it. Alternatively, you can make your post or page “private,” which means that only admins and moderators of the website can see it. Finally, you can make it “password protected,” which means that visitors will need a password to view the content.
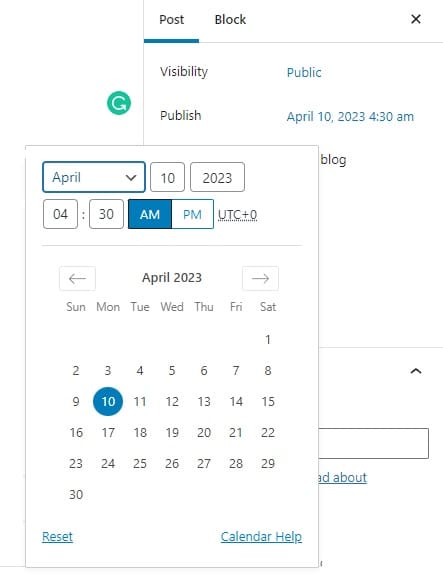
2. Page Status
This option allows you to set the current status of your post or page. “Scheduled” allows you to set a specific date and time for your post or page to be automatically published. With this option, you can set a date in the future or even a past date. When you choose “publish,” your post or page will be visible to the public on your website. If you choose “draft,” the post or page will be saved but not published. Meanwhile, “Pending review” means that the post or page has been submitted for review by an editor or administrator.
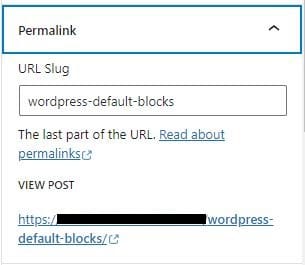
3. Permalink
The permalink is the URL of your post or page. It is the web address that visitors use to access your content. You don’t have to create it manually. WordPress will automatically create the permalink for you once you type in the title of your article or blog post. When you click on the “Permalink” option, you will see the current permalink for your post or page. You can edit the permalink by clicking on the “Edit” button and typing in your desired URL.
However, changing the permalink of a published page can cause issues with links and search engine rankings. If you need to change the permalink of a published page, it is recommended to set up a redirect from the old URL to the new one to ensure that visitors are directed to the correct page.
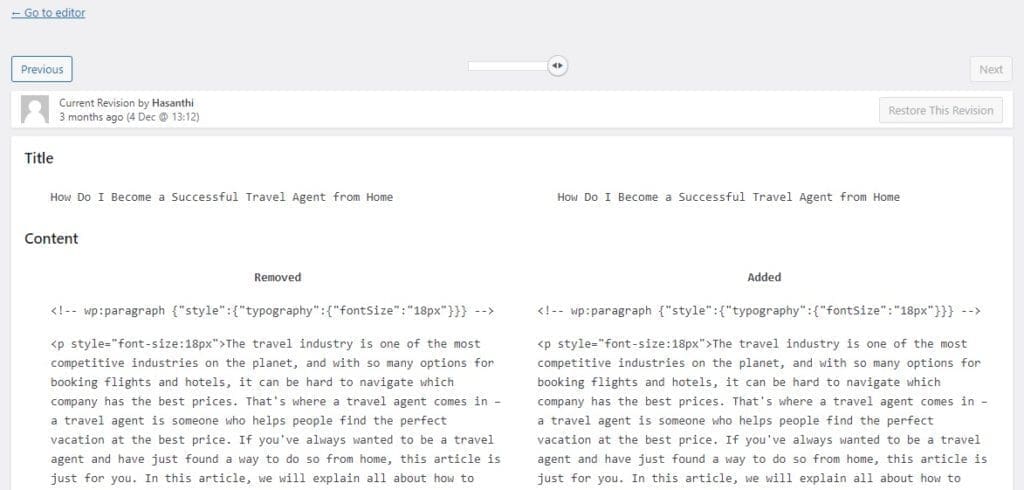
4. Revisions
Revisions are the saved versions of your post that are created automatically as you make changes. They allow you to go back to a previous version of your content if you make a mistake or want to undo changes. When you click on “Revisions,” it will open a screen that shows you a list of all the revisions that have been saved for your post. You can click on any revision to see a preview of that version of your content, and you can also compare revisions side by side to see what has changed. If you want to restore a previous revision of your post or page, click on the “Restore This Revision” button next to the revision you want to restore. This will replace the current version of your content with the selected revision.
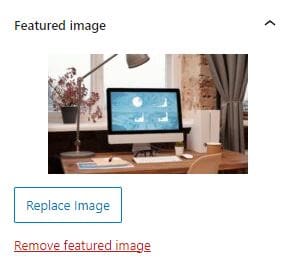
5. Featured Image
A featured image is an image that represents the content of your post or page. It is typically displayed at the top of the post or page and is often used as a thumbnail image when the post or page is shared on social media. When you click on “Featured Image,” it will open a dialog box where you can select an existing image from your media library or upload a new one. Once you have selected an image, you can use the cropping tool to crop the image to the desired aspect ratio or size. You can also add alt text to the image, which helps in accessibility and search engine optimisation.
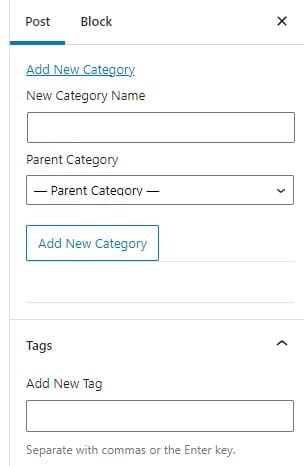
6. Post Categories and Post Tags
Post categories and post tags are used to help organize and classify your content.
Post categories are a way to group your posts into broad topics or themes. You can create as many categories as you need and assign each post to one or more categories. This makes it easier for your readers to navigate your site and find content that interests them. To add a category to a post, simply click on the “Categories” option in the right sidebar of the block editor and select the category you want to assign the post to. You can also create new categories from this same menu.
Post tags, on the other hand, are more specific than categories and are used to identify keywords or topics that are relevant to a particular post. You can add multiple tags to a post to help readers find related content on your site. To add a tag to a post, click on the “Tags” option in the right sidebar of the block editor and enter the tag(s) you want to use. You can also choose from existing tags or create new ones.
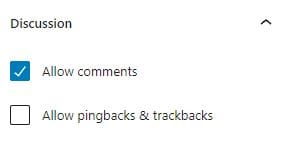
7. Discussion
Discussion allows you to control whether or not visitors can leave comments on your post or page. By default, WordPress allows comments on new posts and pages, but you can disable comments or enable them on a post-by-post or page-by-page basis.
Allowing comments on your posts can be a great way to engage with your audience, but it can also open the door to spam and negative comments. To help combat this, WordPress includes several moderation options, including the ability to require approval for all comments or to automatically mark comments as spam based on certain criteria.
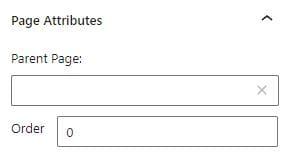
8. Page Attributes (This option shown in Pages only, not Posts)
- Parent Page: A parent page is a page that has one or more subpages (also known as child pages) nested under it. Parent pages and subpages help to create hierarchical structures for pages. For example, if you have a website that sells products, you might create a parent page called “Products” and then create subpages for each category of product you offer, such as “Electronics,” “Home Appliances,” and “Clothing.” Each of these subpages would be nested under the “Products” parent page, creating a hierarchy.
- Order: This option allows you to set the order in which your pages appear in the menu or when using the wp_list_pages() function in your theme. You can set a numeric value for the order, and pages will be displayed in ascending order based on this value.
9. Gutenberg Top Menu
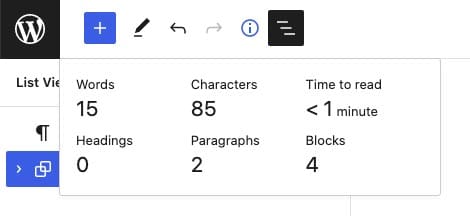
In the Gutenberg top menu screen you will find details about your document, Undo/Redo options, and content blocks you can add to it. The list view option is a really handy feature that shows the layout of your page section by section.
You can access the Gutenberg editor options by clicking on three dots shown in the side of the screen.

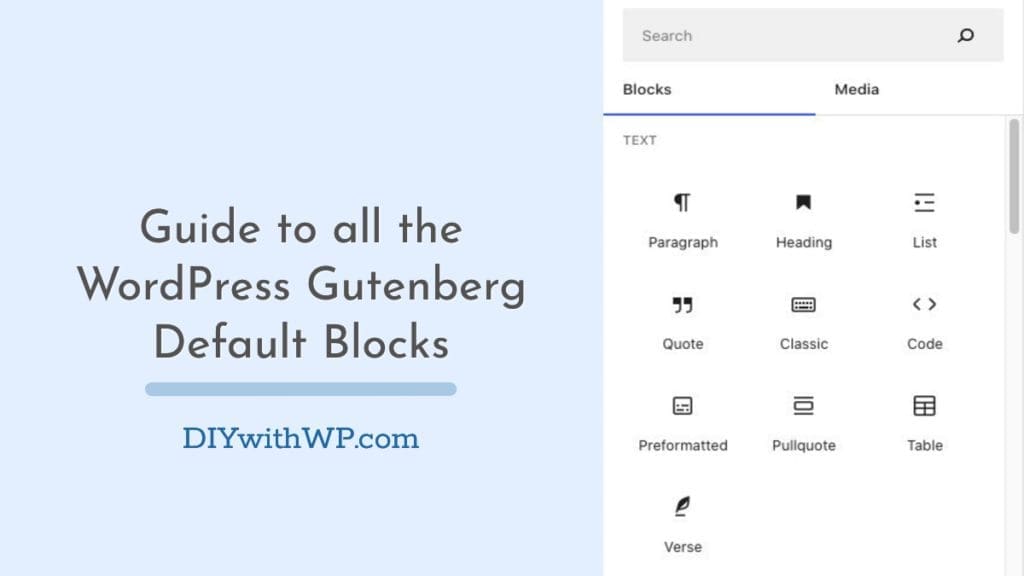
Text Blocks
Whenever you create a new page, you can add content to it using blocks. Blocks allow you to add plain text, headings, lists, links, and other basic formatting.
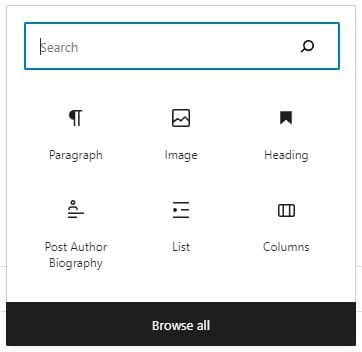
To add text, you can type “/text” in a new line and hit enter. Alternatively, you can click the “+” icon in the editor. By default, you will see 6 types of blocks. If you need more options, you can click on “Browse All” to see all available block options. When you click this option, a new tab will open on the left-hand side of the page, displaying all block categories, including text blocks, image blocks, embed blocks, and design blocks.
1. Heading Block
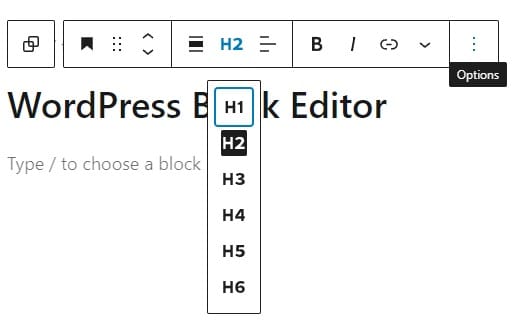
To add a heading block, you can click the “+” icon in the editor and select “Heading” from the list of available blocks. You can also type “/heading” in a new line and hit enter.
Once you’ve added a heading block, you can select the level of the heading (H1, H2, H3, etc.) using the block toolbar. You can also type in your text and apply formatting options such as font size, bold, italic, or underline.
2. Paragraph Block
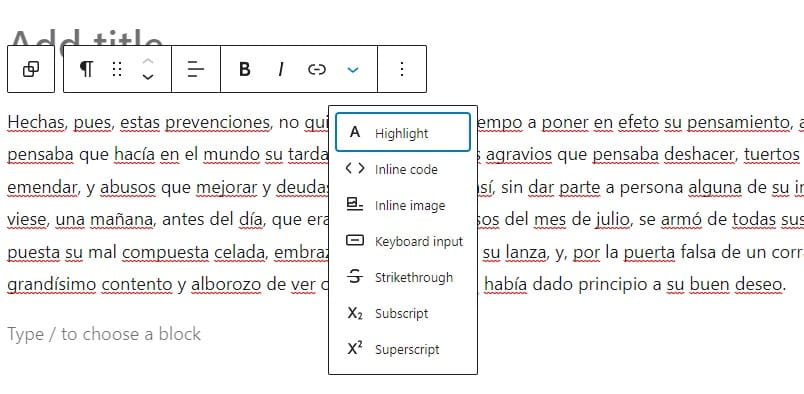
To add a paragraph block, you can click the “+” icon in the editor and select “Paragraph” from the list of available blocks. Once you’ve added a paragraph block, you can start typing or pasting in your text. This block also gives you the option to create lists (bulleted lists) and quotes. You can use the formatting options in the block toolbar to apply bold or italic styling, add hyperlinks, and more. You can also customize the text alignment, text color, background color, and font size of your paragraph using the block settings panel on the right-hand side of the editor.
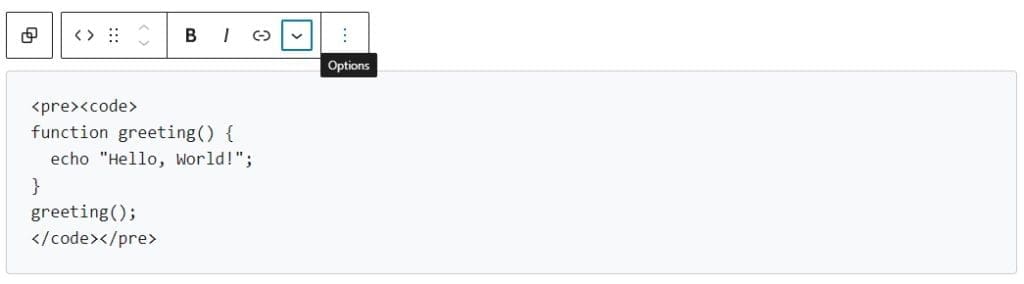
3. Code Block
Code blocks help to display code snippets or blocks of code in your post or page. This is a great tool for developers, coders, and anyone who wants to share code snippets with their readers in a clean and organized way. You can enter your code directly into the block or paste it from an external source, such as a text editor or another website.
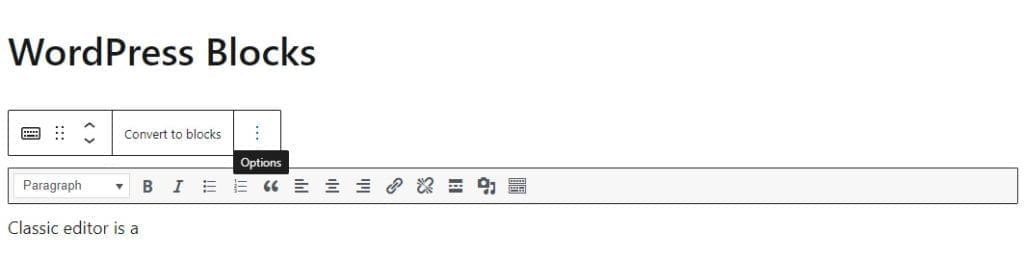
4. Classic Editor Block
The classic editor was the default editor in WordPress for many years before the block editor was introduced. It used a different interface and editing experience than the block editor. With the introduction of the block editor in WordPress, some users may prefer the classic editor interface or may have already created content using the classic editor. The Classic Editor block provides an easy way to continue editing that content using the classic editor interface within the block editor.
When you add the Classic Editor block to your post, you will see a familiar editing interface with a toolbar that includes buttons for formatting text, adding links, and more. You can edit your content as you would in the classic editor but within the new block editor interface.
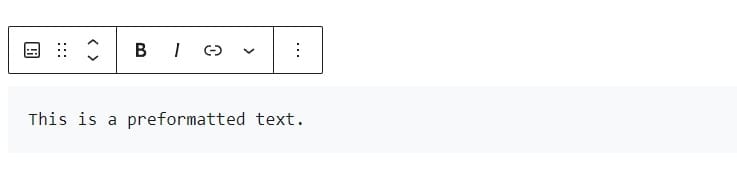
5. Preformatted Block
A preformatted block allows you to display text exactly as it appears, including any extra spaces, line breaks, and special characters. This block is useful when you want to display text that needs to maintain its original formatting, such as code snippets or poetry.
When you add a Preformatted block to your post, you can type or paste your text into the block, and it will be displayed in a fixed-width font. This means that each character takes up the same amount of space, so the text retains its original spacing and alignment.
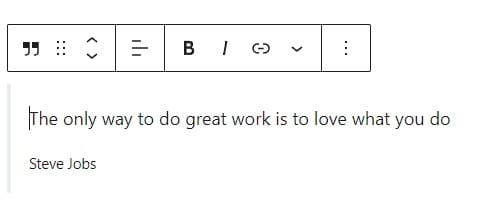
6. Pullquote Block
Quote blocks highlight a section of text from your post or page and display it as a quotation. This block is useful when you want to add emphasis or context to a particular part of your content. When you add a quote block to your post or page, you can type or paste your text and the citation or source of the quote. The quote will be displayed in a stylized format with quotation marks, and the citation or source will be displayed below the quote.
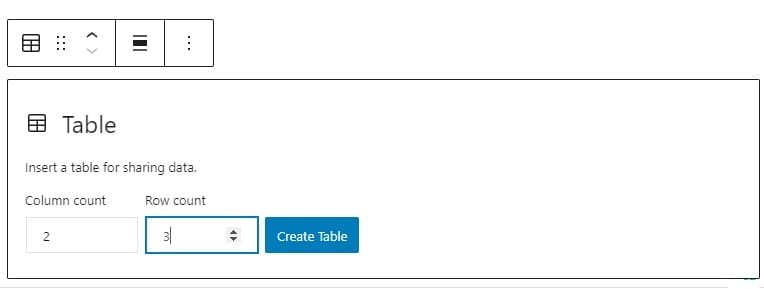
7. Table Block
When you add a table block to your post or page, you can easily create a table by adding rows and columns and then inputting your data into the table cells. You can also customize the table by adding a header row, changing the border and background colors, and adjusting the font size and alignment of the text.
This type of block also includes tools for formatting the table, such as adding or removing rows and columns, merging cells, and resizing cells. This makes it easy to create a table that fits your specific needs and requirements.
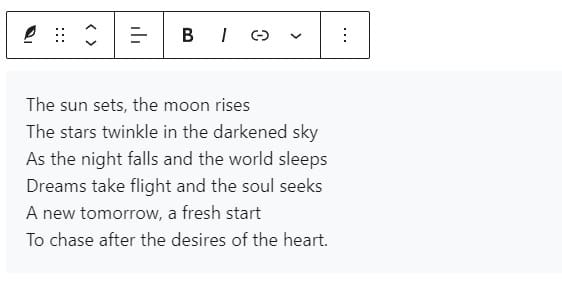
8. Verse Block
This block allows you to display poetry or other text in a visually distinct format. When you add a verse block to your post or page, your text will be displayed with a fixed-width font and line breaks where you’ve entered them.
Media Blocks
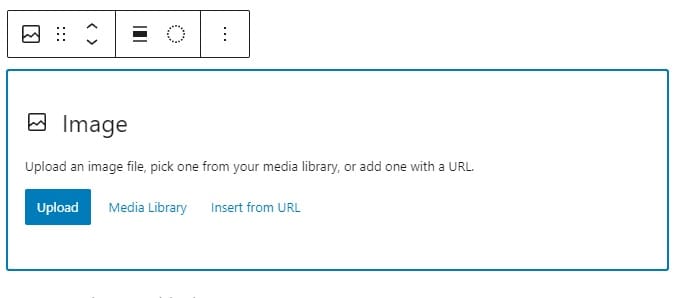
1. Image Block
An image block allows you to upload an image from your computer or choose one from your media library. You can then customize the image by adding a caption, alt text, or a link. Once you have added the image to the post content, you can even resize the image by dragging it from the bottom or sides. If you want, you can also crop the image once you have uploaded it into WordPress.
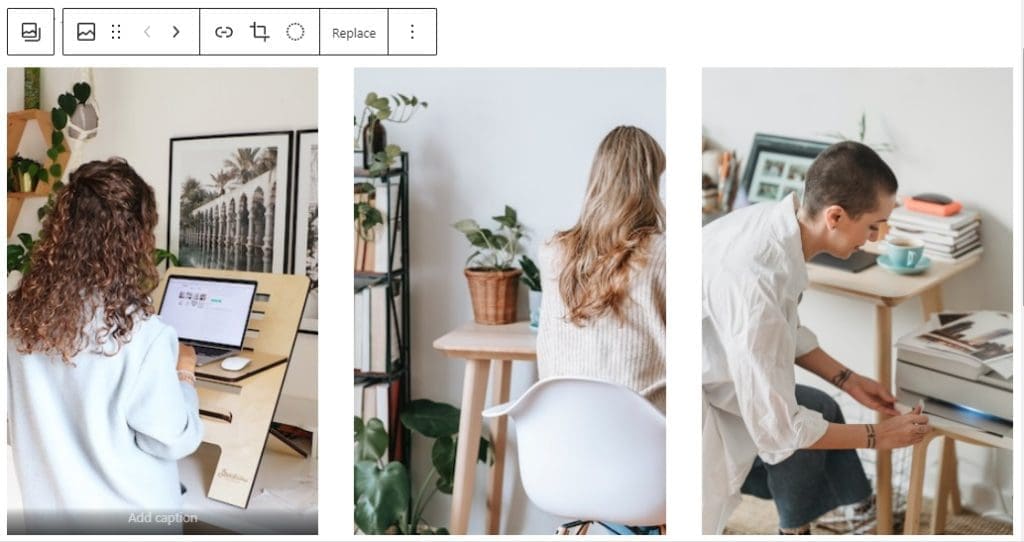
2. Gallery Block
A gallery block helps you display multiple images in a grid or mosaic layout. You can upload or select multiple images at once and then customize the gallery by choosing a layout, adding captions, and adjusting the size and spacing of the images.
You can use the arrows to change the order of the images. One best practice to follow when using a gallery block is to make sure that the height and width of the images are equal. If your images are different in size, you will not get a proportional image.
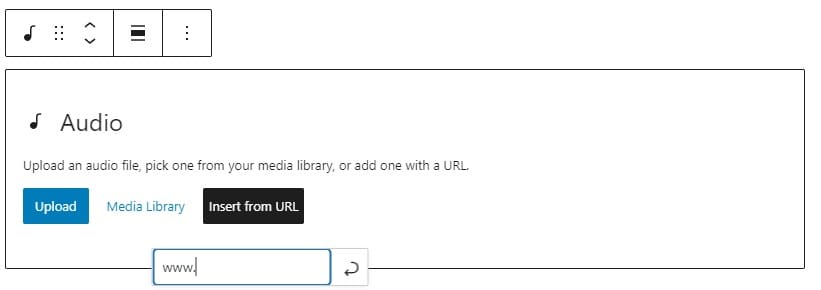
3. Audio Block
You can add an audio block to the post by uploading it, choosing from the gallery, or directly via a URL. With the audio block, you can add audio files such as music, podcasts, or any other audio recordings to your content. Once you add this audio block, visitors to your website can listen to the audio file directly from your post or page without the need to leave your website or open a separate media player.
4. Cover Block
Cover blocks are used to create a visually striking cover image or video for posts. It can help to create an engaging header section or a full-page background that enhances the overall look and feel of your content. Once you have added the cover block to the post content, you can customize the layout settings, including the alignment, height, and width of the cover block. Additionally, you can add text or other blocks to the cover block, such as headings, paragraphs, or buttons.

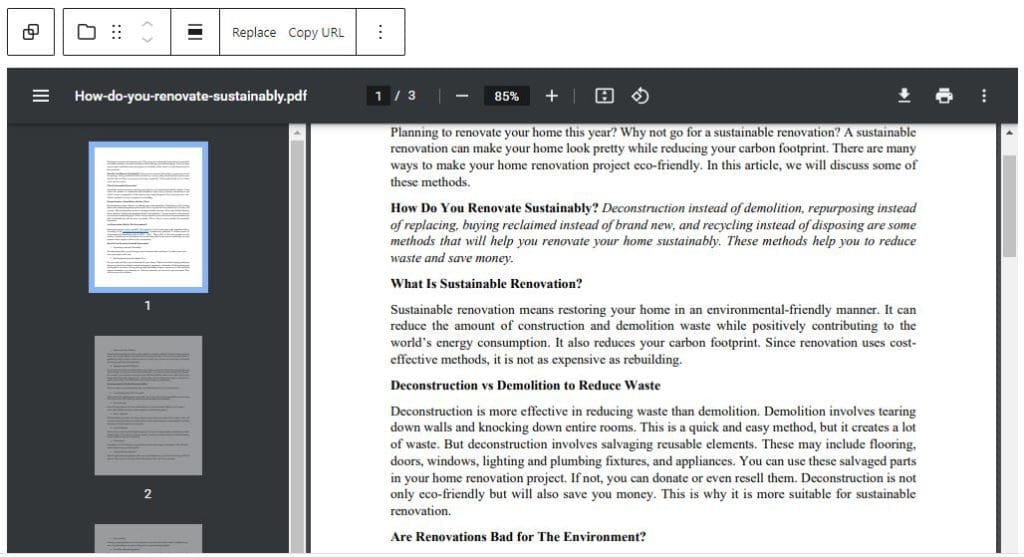
5. File Block
With a file block, you to add a link to a file that visitors can download or view, such as a PDF or Word document. This type of block is useful when you want to provide your audience with access to additional resources or information related to your post. When you upload a PDF, the page will automatically open with a PDF reader, and visitors can read it within the page. But when you add a Word document, the visitors only have the option to download it.
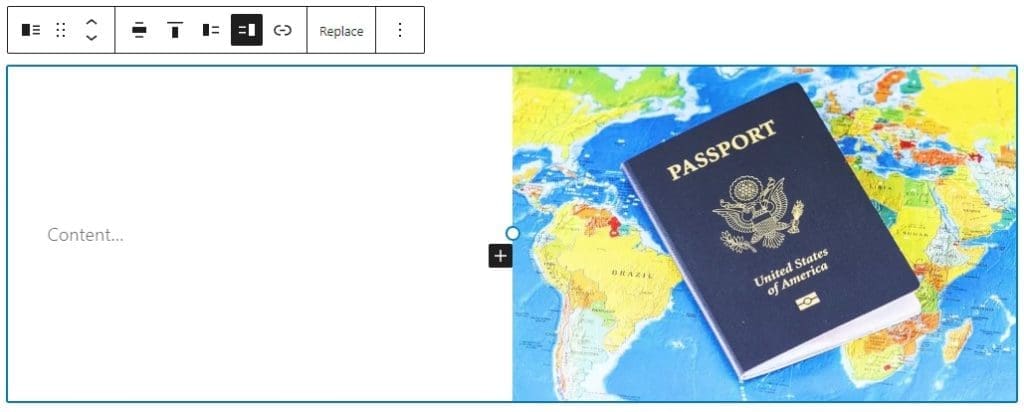
6. Media & Text Block
Media & text block is a versatile block in the block editor that allows you to combine media and text content in a single block. This is a flexible way to present information that includes text and media, such as images or videos, side-by-side or stacked on top of each other.
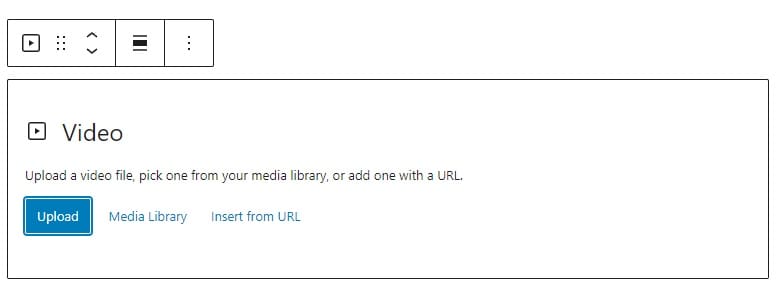
7. Video Block
Video blocks help you to embed a video into your post. You can add videos from a variety of sources, including YouTube, Vimeo, or your own media library. Once you have added and configured your video block, visitors to your website can watch the video within the block.
Design Blocks
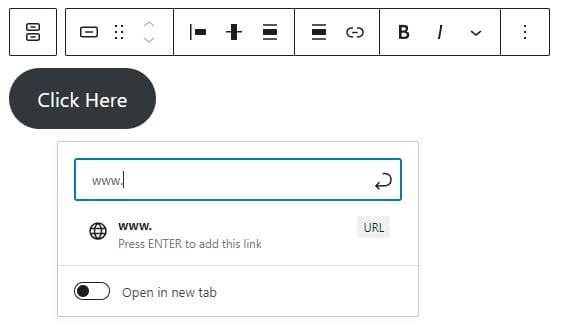
1. Button Block
This block allows you to create customizable buttons for your content, including setting the button text, background color, and font color. You can add a link destination to the button so that when visitors click on it, they will be directed to the relevant page or website.
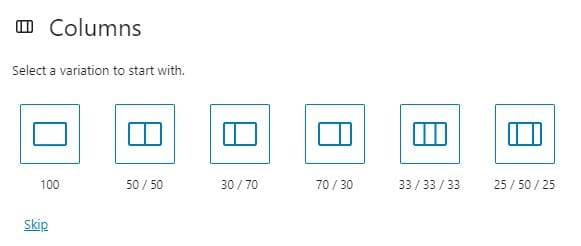
2. Column Block
A column block divides your content into separate columns. This block allows you various options to create columns, including two equally split columns, three equally split columns, two columns with one-third and two-thirds splits, and three columns with a wide center column. Overall, column blocks help you display multiple pieces of content side-by-side in a visually appealing way.
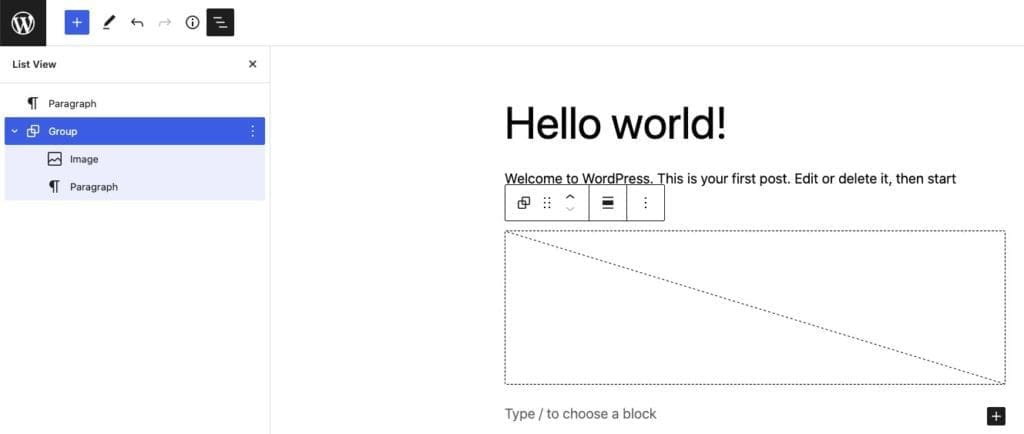
3. Group Block
Group block allows to group separate blocks added into a page into a one section. This helps with managing and styling of these grouped blocks.
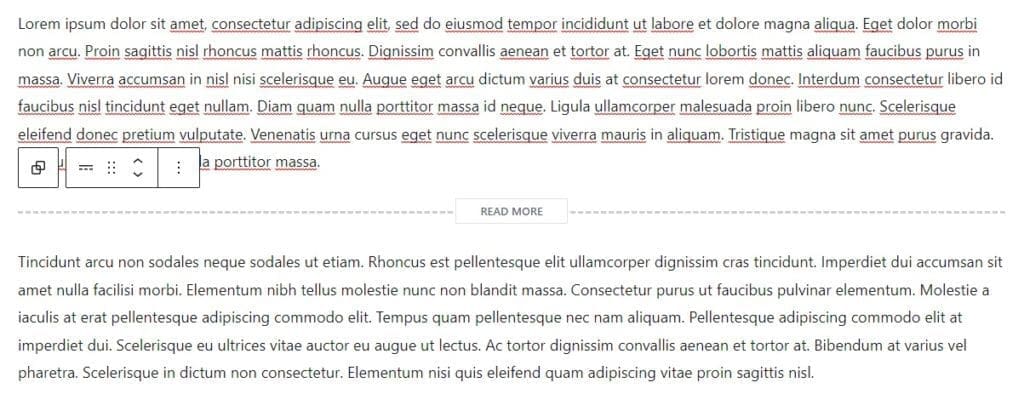
4. More Block
The More block allows you to limit the portion of the post you want to show at the post archive page. This block can be useful when you have long articles or pages, and you want to display only an excerpt, with a button that readers can click to view the full content.
5. Separator Block
Separator adds a horizontal line to your content, providing a clear visual break between sections. The main function of a separator is to create a break between ideas or sections with a horizontal separator. You can add this separator as a wide line, a short line, or as dots.

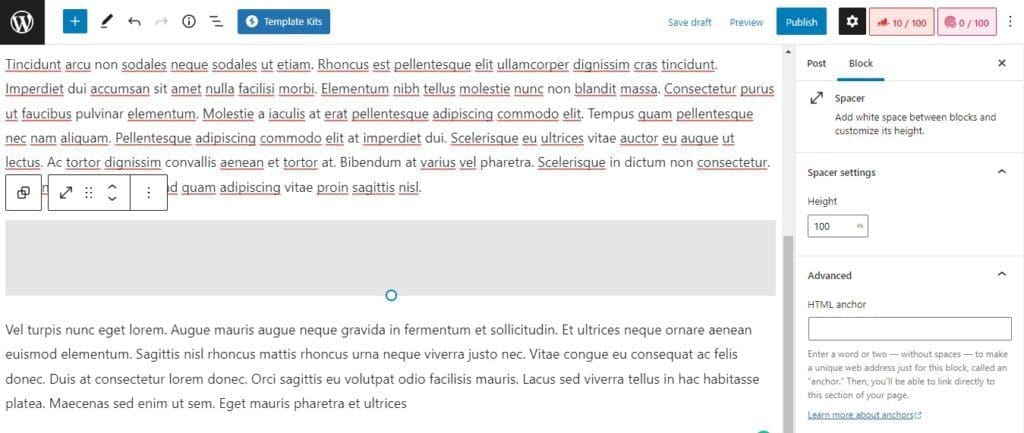
6. Spacer Block
Spacer provides options to add blank space between content sections. You can adjust the height of the spacer block to create the desired amount of blank space.
Widget Blocks
Widget blocks allow you to add dynamic content to your posts or pages without needing to write any code. In fact, they are a core feature of WordPress.
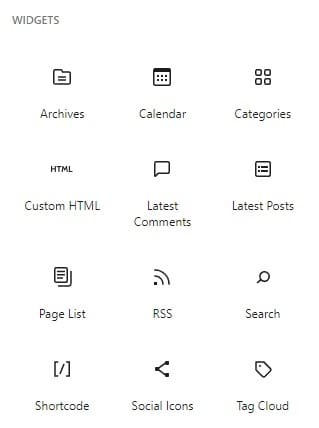
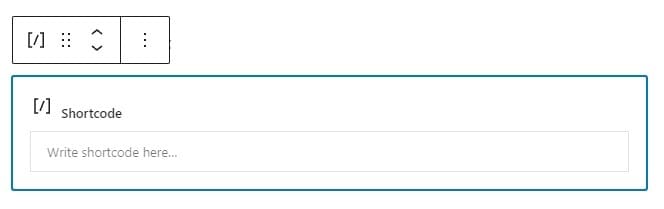
1. Shortcode Block
The shortcode option allows you to add a short code to your post or page. You can insert the shortcode directly into the block editor, and it will be rendered as a specific function or content that you want to display. This can be useful for adding custom functionality, such as inserting a contact form or embedding a video, to your WordPress site without needing to write any code.
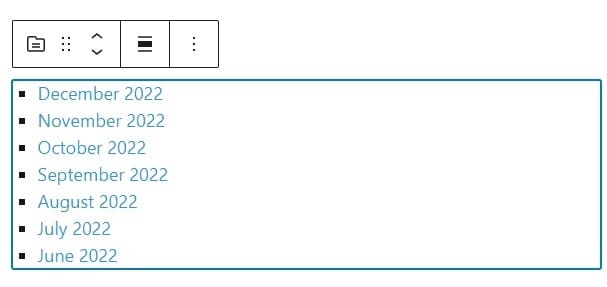
2. Archive Block
Archive displays a list of your site’s posts sorted by date, as well as a list of your site’s categories and tags. You can customize the archive widget to display posts by year, month, or category, making it easy for users to find the content they’re interested in.
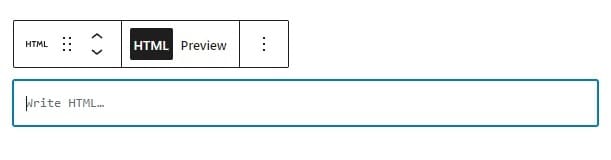
3. Custom HTML Block
Custom HTML widget block helps you to add your own HTML code to a WordPress post or page. This can be useful for adding custom elements or formatting to your content or for embedding third-party widgets or scripts.
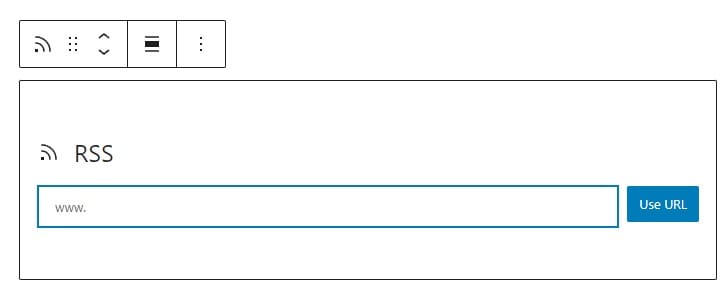
4. RSS Block
RSS widget block allows you to display RSS feeds from other sites on your WordPress site. You can customize the RSS widget to display the feed in a specific way, such as showing only the latest posts or including images.
5. Social Icons Block
Social icons allow you to display social media icons on your WordPress site. You can customize the Social Icons widget to display icons for specific social media platforms, such as Facebook, Twitter, and Instagram.
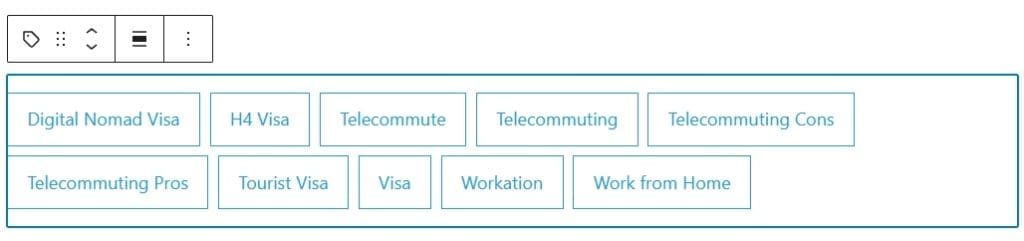
6. Tag Cloud Block
The Tag Cloud widget block displays a list of your site’s tags, with the size of each tag indicating how often it has been used. This can be a useful way to help users navigate your site by topic or keyword.
Theme Blocks
Theme blocks are designed to work specifically with the theme and provide additional functionality beyond the core WordPress blocks.

Here are some examples of such blocks:
- Query Loop Block: This block allows you to display a custom list of posts or pages on your site, with options to filter by category, tag, or custom post type.
- Site Tagline Block: This block presents your site’s tagline or slogan and can be customized with various font styles and colors to match your theme.
- Posts List Block: This block displays a list of posts with featured images and excerpt text and can be customized to display posts by category, tag, or custom post type.
- Navigation Block: This block displays a menu or navigation bar, allowing users to easily navigate your site. You can customize the navigation block with various styles and options to match your theme.
- Avatar Block: This block presents the author’s avatar or profile picture, along with their name and bio. This can be a useful way to add a personal touch to your site and build connections with your readers.
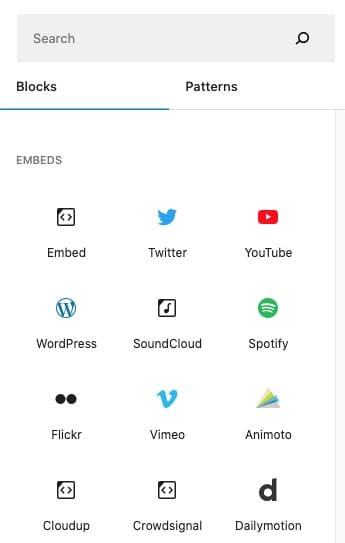
Embed Blocks
These are kind of blocks designed to pull contents hosted in other sites like YouTube, Twitter and Tiktok among others. Iframe contents are also supported. Design controls are available to style the embed the way to want.
The WP block editor is a powerful tool that offers endless possibilities for creating dynamic and engaging content on your website. By understanding and mastering the different blocks available, you can design beautiful and functional pages and posts that will impress your audience. We hope that this guide has helped you gain a deeper understanding of the WordPress block editor and inspired you to create unique and compelling content. So, start exploring the different blocks and unleash your creativity!