Table of Contents
Sometimes we need to create a website but the content should be available only for the selected people. Like your friends, family members, relatives, students, teammates, etc. Think that you want to create some lessons to share with your students. Only for them. So let’s see how to make a WordPress site private. The complete website, a single page or post.
Making a WordPress site private
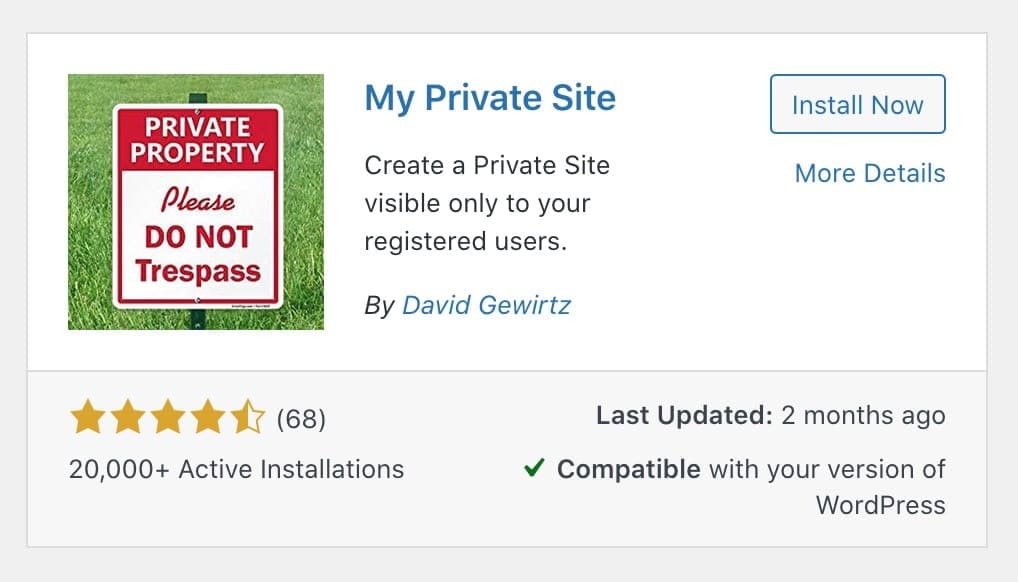
To make a whole website private we can use a third-party plugin like My Private Site. It’s a free plugin that you can install from the WordPress plugin repository. Go to the Dashboard > Plugins > Add New and search for My Private Plugin.
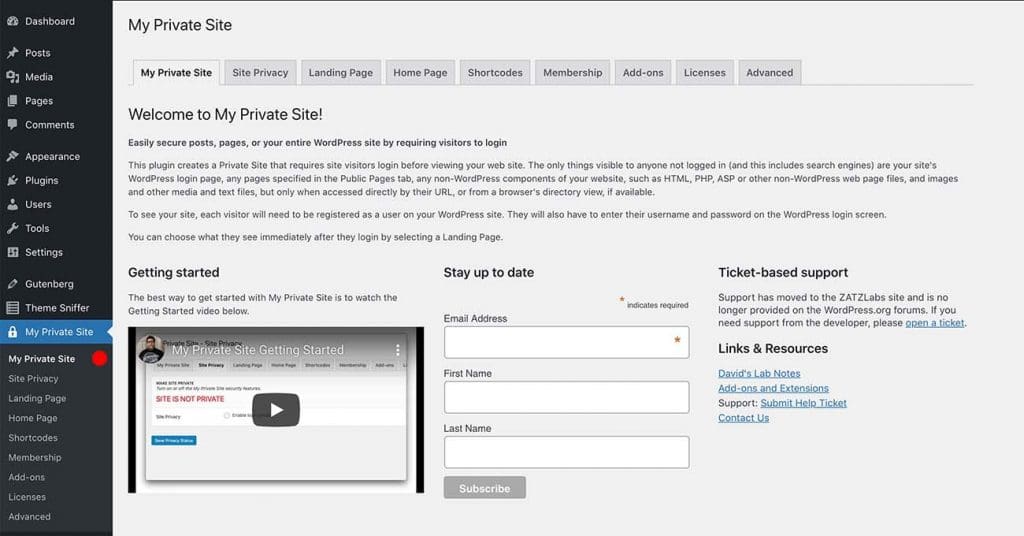
Once you found it, click on Install Now and activate it. After activating you will get a new menu item called My Private Site on the dashboard. Below is the welcome page of the plugin settings. As you see below there are a few tabs that we can use to configure the plugin the way we want. Let’s go through them one by one.
Site Privacy
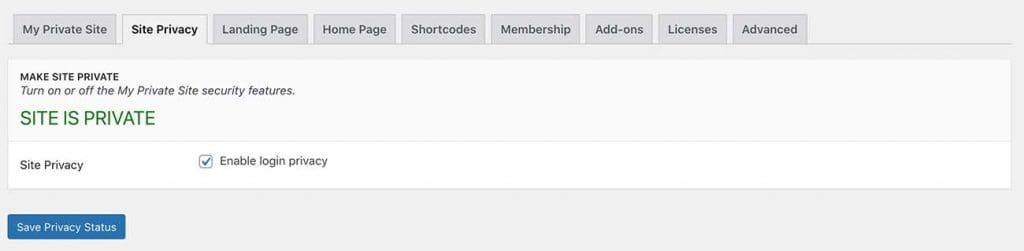
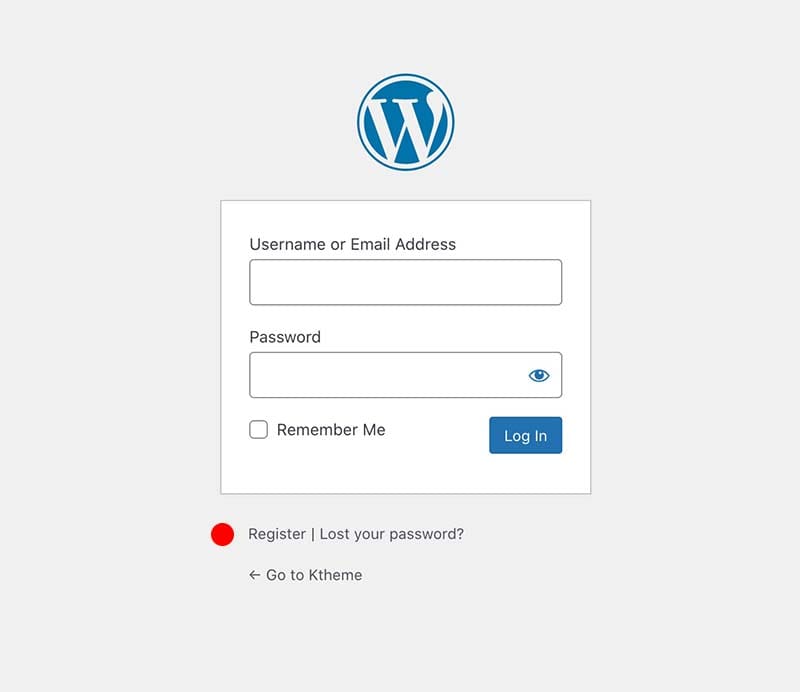
The first step is here to make your WordPress site private. Go to the Site privacy tab. Check on Enable login privacy and click the Save Privacy Status button. You will see the ‘SITE IS PRIVATE’ message in green if everything has gone well. In this status, if someone tried to access your website’s front end, the plugin will automatically redirect them to the WordPress login page. That means the front end is only available for registered users on your website.
Landing Page
Once your registered visitor successfully logged in, by default the plugin will return them to the page they requested. But if you want, you can change this behavior in this tab. You can set different rules to handle this request and redirect them to specific pages.

Home Page
What if you want to have the home page available for anyone in the privacy mode? So anyone can see the home page but not the inner pages. To do that go to the Home Page tab and check on ‘Allow site home page to remain accessible without requiring login’. Save the change by clicking Make Page Public button.
If you want to make any other pages available for unregistered users, you have to upgrade the plugin to the paid version.

Also, the Shortcode Tab setting is also available only for paid customers. With that, you can make a certain part of your website private. If you want such privacy I think you can consider upgrading.
Membership
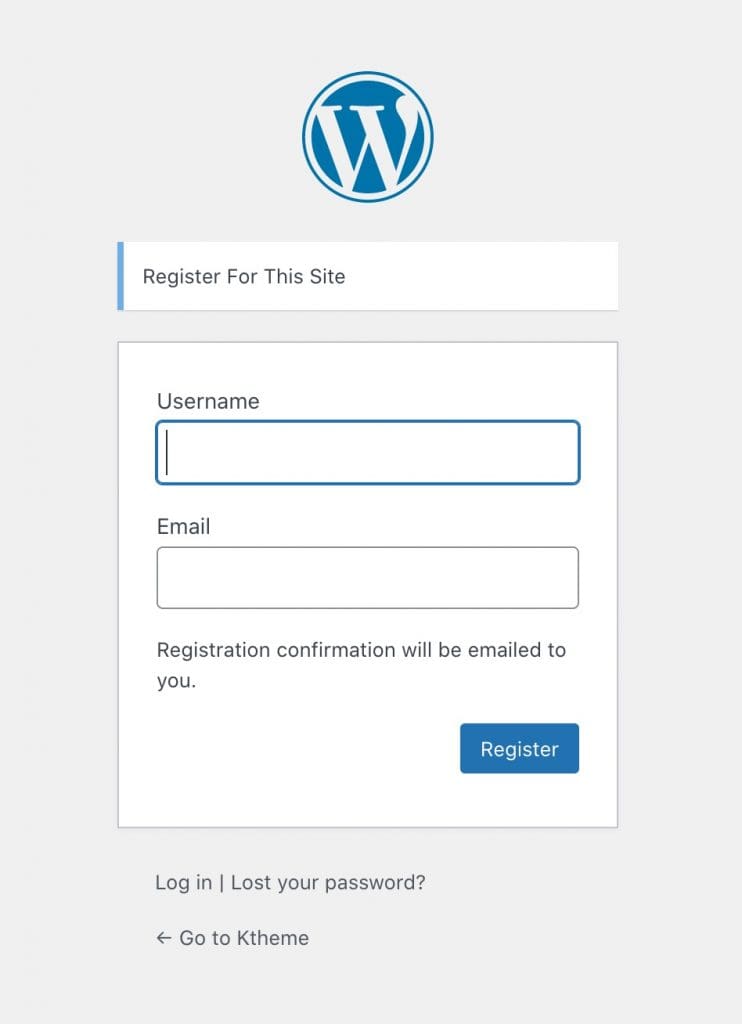
This is an important setting. If you want your visitors, students, family members, etc to register on the site themselves, you can enable it here. Check on both the ‘Membership’ and ‘Reveal Registration Page’ settings and push the button ‘Update Options‘.
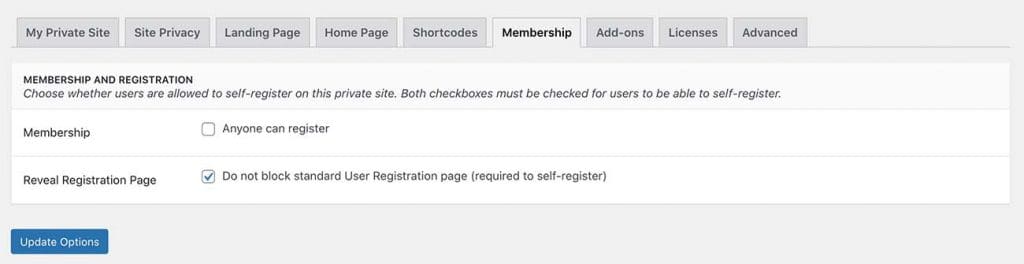
Once updated you will see that the ‘Register‘ link is available on the login page which your visitor can create a new account on your site.
So, making your WordPress site private is that easy with this free plugin ‘My Private Site’. But, do you know that there is a built-in solution in WordPress which you can use to make your individual blog posts or pages private or password protected?
How to make individual posts or pages private in WordPress?
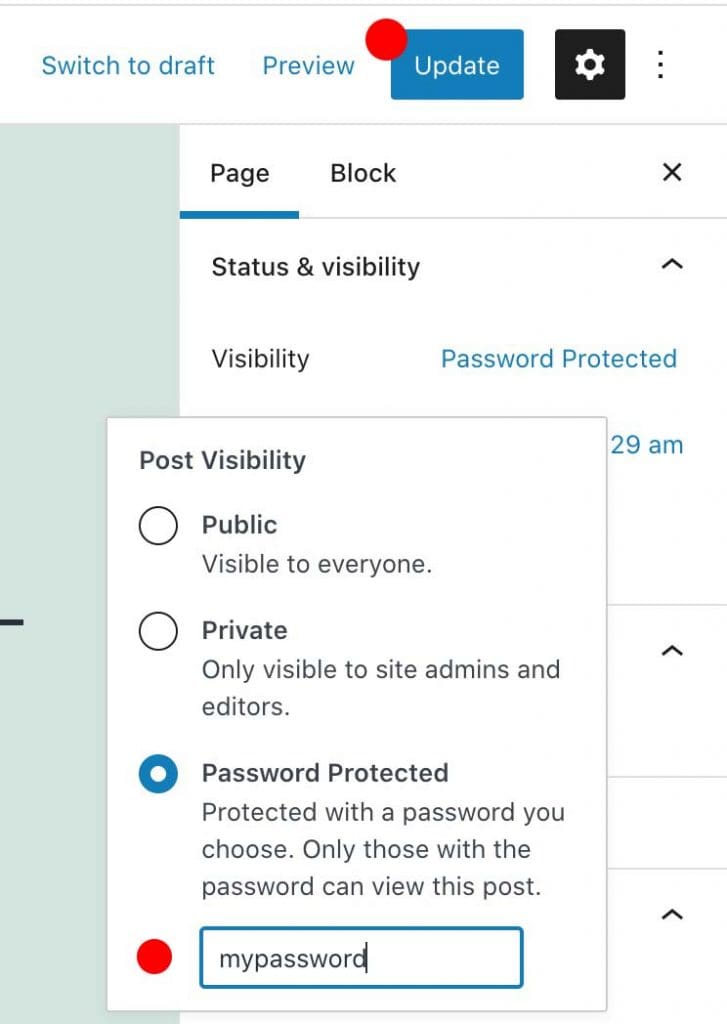
Go to your article or page. Check on the top right to find the Status & Visibility setting meta box.
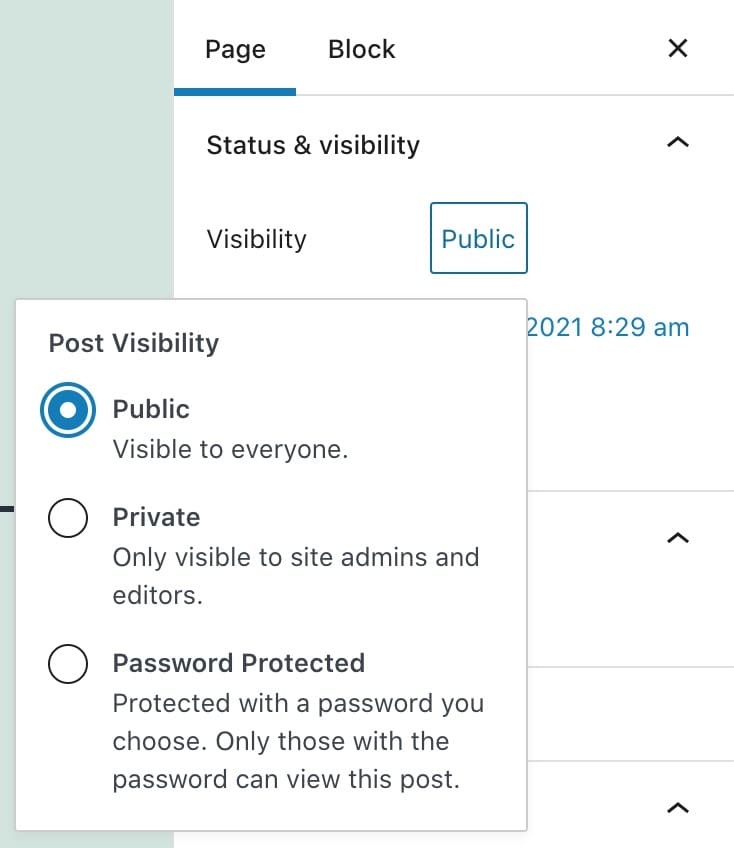
Click on the Public link in front of the Visibility setting. As you can see in the popup we have 3 options here.
Public: Anyone can view the content
Private: This content is only available for registered admins and editors. Once they logged in they can view the content.
Password Protected: By choosing this you can set a password for your content. Then you can send your users the password via email or text.
Password protect your page or post
Choose the Password Protected radio button. As soon as you choose you will see the input field where you can add your new password. Once set, update the post. Now the page or post is password protected and the visitor needs the password to see the content.
Password protect your WordPress website
As I have shown above you can use WordPress’s built-in feature to password protect a page or a post. But there is another way that you can make your entire WordPress site password protected. There are plugins that we can use to achieve this.
When I start a new project I always password protect the front end. The main reason is I don’t want search engines like Google to crawl that unfinished pages. So, once I finalised the site I can submit it myself.
Ok, go to the Dashboard > Plugins > Add New and search for Password Protected. Once you found click on Install and activate it.
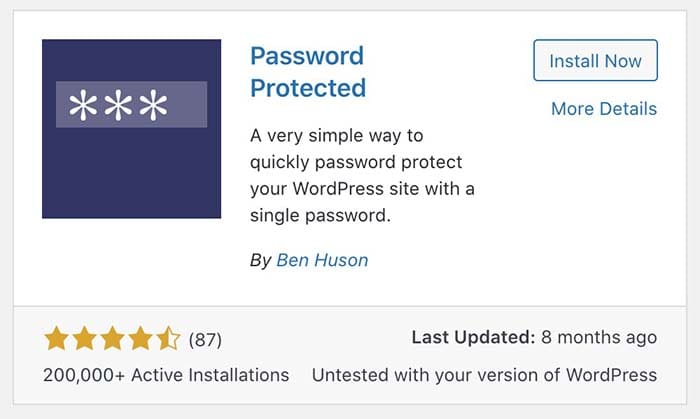
Upon activation, the Password Protected plugin will add a new menu item to the WordPress setting menu. Click on the link and open up the setting page.
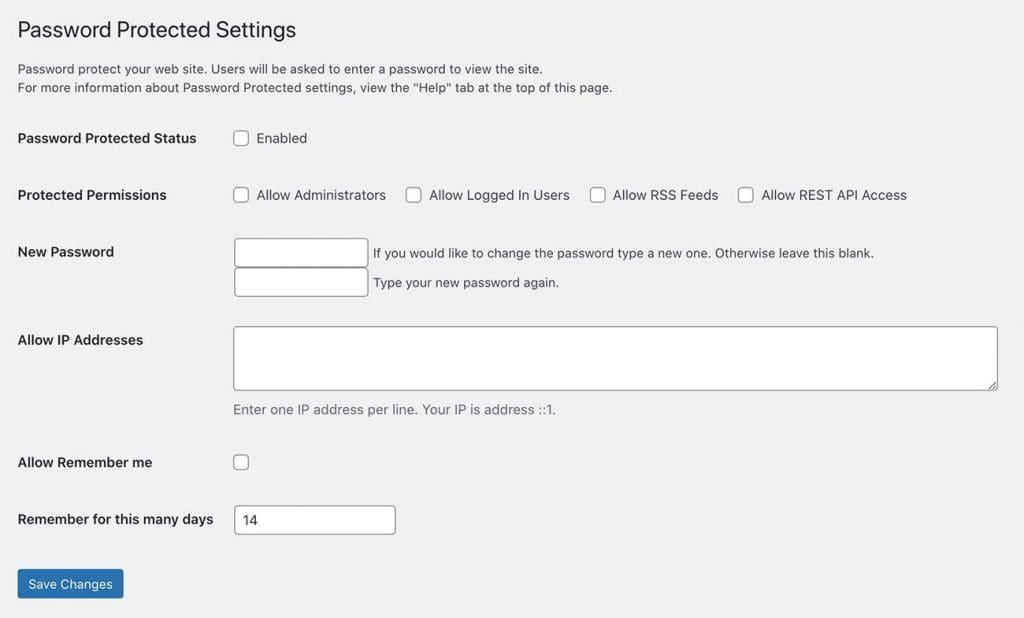
As you can see the interface is very simple. Just check on ‘Password Protected Status‘ to enable it and add your new password twice in the New Password fields. That’s almost it. Your WordPress site is now password protected and no one can see the front end.
There are some advanced settings as you can see which you can use to allow access to some selected ones like administrators and logged-in users. Also, you can add a specific IP address to bypass the password-protected plugin.
That’s how to make a WordPress site private. The entire site or a page/post. If you think I have shared some valuable piece of information, share it with your friends. 🙂